RIDE WITH ME
My name is Colin and I hope you enjoy browsing my site. There is plenty of information about adventure riding and heaps of tricks you may not have even considered. Contributions are only opinions and everyone is different.
Don't forget to checkout my sales area where I have a limited amount of quite bespoke accessories and parts.
If you want to be kept up to date with tour details, workshop dates and RIDE WITH ME specials then go down to the "Subscribe" section and flick me your email address
Im back in Perth but only around until about the 20th June.
Tools
Essentials
Three points of contact
OSAH DRYPAK
Secure your bike and gear
Workshop services
Service Gear
Tyres and tubes
Hire gear
Miscellaneous
INteresting Topics
Videos relating to RideWithMe
Sheds matter by Steve Fraser
https://youtu.be/hC8JOX_A6_4
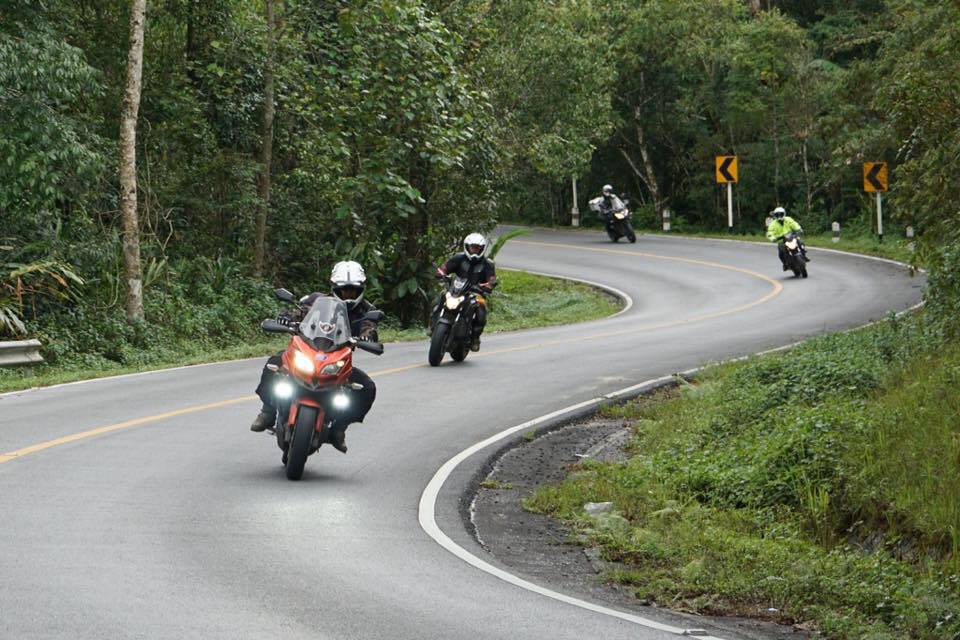
Colin Bayman presents the cornerman system
https://youtu.be/bARKkRAEqu8
The original trail stand video by Ned Kelly
https://youtu.be/_Id7wMpPGHY
The T7 muffler upgrade - how to.
https://youtu.be/R84FIHTUZfY
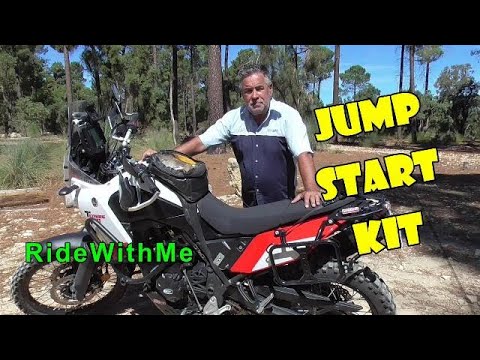
Jump start kit vid by Ned Kelly
https://youtu.be/pm3ZBW8YxRY
Removing the rear wheel on a T7 using a trail stand - RiderGuider
https://youtu.be/bst8RMyesDc
How to use the trail stand - RiderGuider
https://youtu.be/5Qqmqo-ZMVo
T7 and DRZ extended foot pegs - RiderGuider
https://youtu.be/2-TaoNtYK9E
https://youtu.be/hC8JOX_A6_4
Colin Bayman presents the cornerman system
https://youtu.be/bARKkRAEqu8
The original trail stand video by Ned Kelly
https://youtu.be/_Id7wMpPGHY
The T7 muffler upgrade - how to.
https://youtu.be/R84FIHTUZfY
Jump start kit vid by Ned Kelly
https://youtu.be/pm3ZBW8YxRY
Removing the rear wheel on a T7 using a trail stand - RiderGuider
https://youtu.be/bst8RMyesDc
How to use the trail stand - RiderGuider
https://youtu.be/5Qqmqo-ZMVo
T7 and DRZ extended foot pegs - RiderGuider
https://youtu.be/2-TaoNtYK9E
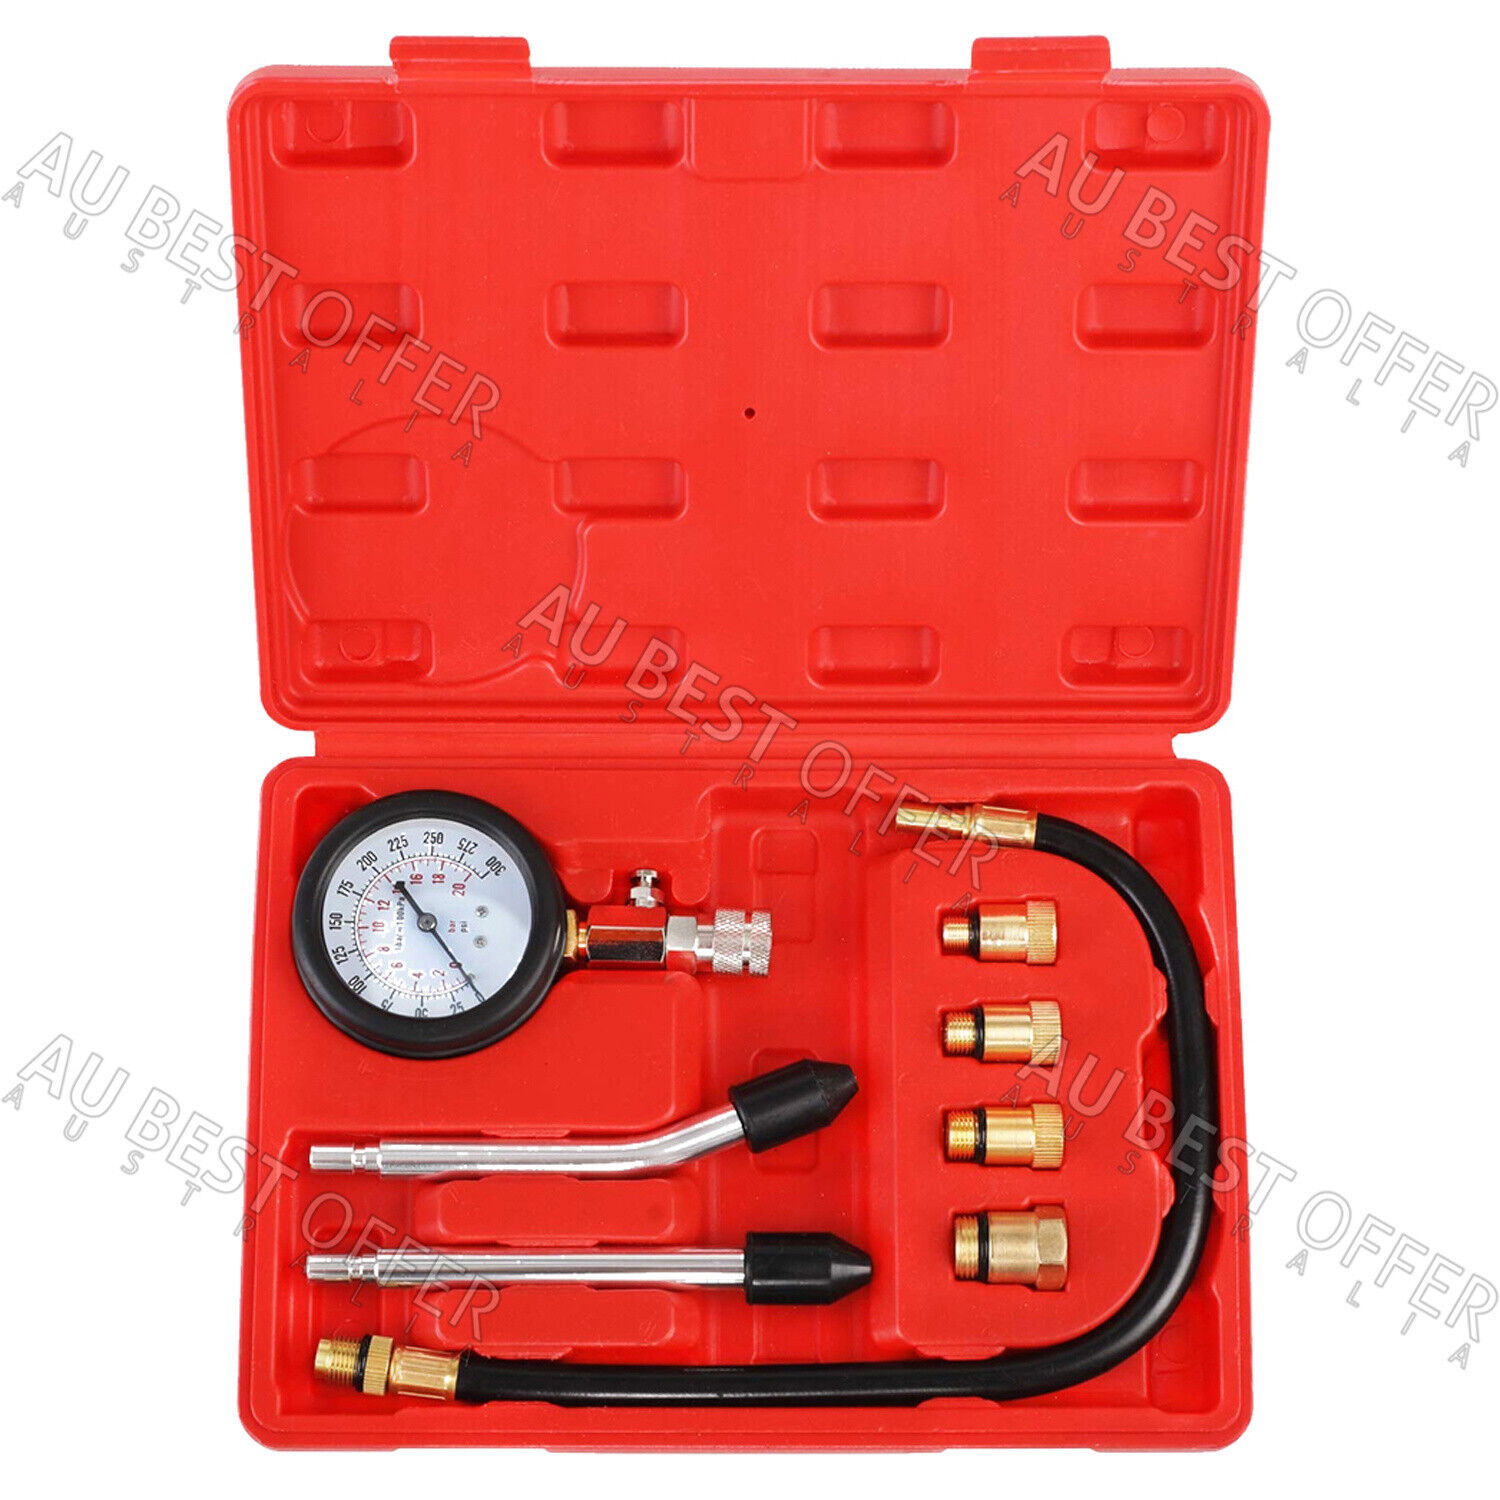
Engine wear- is it your valves or your rings?
Engine compression tester!
Once your bike has some decent kms on the clock a compression tester is a must when you are doing your own big services. This handy little inexpensive tool can tell you far more that you think about your engine. A compression test can help tell you if your rings are worn or your valves need adjusting.
Remove your spark plug and install the tool. Turn the motor over for a few seconds and take a reading. If your reading is lower than what the manual says it should be then you need to do a second reading but this time first pour a half a coke bottle lid of oil down into the cylinder and repeat the test.
If your reading increases dramatically then its likely your valves are adjusted OK but your rings are worn. If your reading does not increase or not by a lot then its likely your valves need adjusting or replacement. Either way, you now have diagnosed parts of your bike engine condition. Its a great starting point.
I want to go motorcycle riding in Vietnam or Cambodia.
Thailand, Maylaysia, Indonesia or Laos would be the easier choice as it is not possible to legally ride in Vietnam (or Cambodia) on an Australian license. Australian-issued IDP’s are not recognized under current treaty arrangements. The only way to do it is to obtain a 3-month temporary residency visa and get an associated temporary Vietnamese license conversion. No license, no third party or medical insurance cover.
How will you fund a medical evacuation home for 150 K. What will happen if you hit a local and injure or kill them and you don't have a legal driver's license.
Do not believe the local tour company who will promise you a temp permit or license. They just want your business.
https://hcmc.consulate.gov.au/.../DrivinginVietnaminformation
You want to buy a bike from out of state?
Contributor - Tony Friday
You have found the perfect bike … but it’s in another State
WA is a big State with a small population and a limited number of 2nd hand bikes. Waiting for a low mileage, perfect condition machine to come on the market can test the patience of any prospective buyer. Opening up the search criteria to the Eastern States makes a huge difference to the number of choices, but also introduces some new problems.
This article has been written to help you navigate the challenges of an interstate private purchase. If you are considering an interstate dealer purchase then you may still be interested in the observations about payment and shipping for the bike.
The normal WA purchase method of pop round for a chat, take it for a ride, and find some friends in common isn’t available for an interstate purchase. Nor is your local friendly mechanic who can be bribed to have a quick look at it for a carton of beer. Picking up the bike via a hair-raising pillion ride on the back of a mate’s bike is also off the menu. It’s already sounding a bit too hard.
However, if you have the appetite to read on, let’s work out how to actually make this happen.
Once you have found the a potential bike, a decent chat with the seller can be the quickest way to get the ball rolling. A cooperative and motivated seller is a huge advantage in any intestate sale, so take the time to be nice, make a new friend, and work together cooperatively. Remember, if all goes well, then they will be inconvenienced by helping you with some of the logistics.
The purchase process starts with a live video walkaround – not a set of (potentially photoshopped) photos. If modern technology can make Donald Trump look and speak like Barack Obama, then removing a few dents and scratches from a bike photo is clearly not too hard. A live video inspection allows you to virtually walk around the bike and conduct an inspection as if you were there with the buyer.
Have them take off the seat and inspect the airbox to see if regular maintenance is being done, crawl under the bike and look for any obvious oil leaks, rotate the rear wheel on the centre stand and look/listen to the chain. Go through all of the basics as if you were standing right there next to the seller and trying to see if they cared for the machine properly.
If it looks okay, we then need to check out the owner. The process of getting a free rego check is quite easy. All you'll need to do is visit the website of the transport authority in the State where the bike is registered and enter the registration number or the VIN of the bike. It won’t tell you who the owner is, but it will tell you if it is correctly licensed. Combining this with some sighted ID from the owner helps give the same level of comfort as if you were buying in WA.
Many buyers proceed directly from this step to purchase without a mechanical inspection. Whilst not recommended, I have acquired a few bikes from interstate in the past without incident or regret having satisfied myself that the person seemed genuine, the bike looked immaculate, and the paperwork was in order.
If you do want to arrange a mechanical inspection and don’t know anyone in the area, then joining the RAC in WA will give you reciprocal access to the auto clubs in the other States. This means you can call them to explain your purchase intentions and ask for a list of local motorcycle mechanics who may be able to assist with an inspection.
Once you have arranged an inspection with a nearby bike service centre or dealership, please don’t expect the seller to drop it off there, wait around for it, pick it up, pay for it, etc without payment of a decent deposit. Any transaction between two parties involves an element of trust, but expecting a seller to do this without any tangible commitment on your part is simply not reasonable. At the very least, a deposit (paid to a bank account) should cover the reasonable costs of their time and out-of-pocket expenses. If the inspection shows anything other than minor issues then you can negotiate the return of your deposit or be prepared to write it off, the same as if you were purchasing the bike here in WA.
It's looking good - seller is a great person - the bike checks out perfectly – let’s do this …
Unless you are going to fly over and take possession of the bike yourself (you should consider this), then there needs to be some form of financial exchange. Very few freight companies will do collection of payment on delivery for shipped goods nowadays, and placing funds into bank escrow is time-consuming and paperwork-heavy. Fortunately new providers have entered the market to service this need, and providers like www.checkvault.com.au can provide one-time escrow services.
Of course, sometimes the seller will not want to use the escrow service. This is sometimes the case because they don’t understand how it works or don’t trust it. If they are still unwilling to engage after some discussion then you a really only left with the option of a bank transfer, but this should be timed with the collection of the bike by yourself or a delivery/freight agent.
The first option is to actually go and collect the bike. On the upside, it’s an adventure, an opportunity to back out if you really hate the bike, and a chance to meet your new friend (the seller) in person. On the downside, it’s expensive including airfares and accommodation, you may need a week or more, it will add a few thousand to the mileage, the bike will probably need service and a new set of tyres, and you will need a heap of physio by the time you get home.
The second option is to offset the outbound cost and the physio by looking for someone to ride it over for you. Plenty of international overland traveller sites have people who will consider this, and you will need to spend some time with them first to satisfy yourself that you can trust them with our new toy. For more info on this option, check out the HUBB on www.horizonsunlimited.com
The final option is to ship the bike back to WA using a professional delivery service. If shipping directly, costs can be minimised by arranging to have the bike dropped off at a collection depot, and then you pick it up from the destination depot. These are usually located in industrial areas, and you should expect to cover the cost of the Uber fare home for the seller. Door to door pickup and delivery can almost double the cost of shipping a bike from the east coast to WA.
Ask the seller to take a final set of photos and the depot along with any keys, accessories or other inclusions. This will help resolve any arguments about damage in transit. The bike should be dropped off with almost no fuel in the tank and the screen removed/wrapped in a blanket if possible.
Damage in transit is a real issue unfortunately, and difficult/expensive to insure against. Bikes are inherently difficult to ship because they are awkwardly shaped, hard to tie down, and easy to damage. Many freight companies won’t touch them unless the bike is crated (and that’s another story). It’s far better to use a specialist motorcycle removalist like www.bikesaborad.com.au who will ensure the bike is appropriately prepared and safely moved. There is only a small cost difference, and you have the comfort of knowing your bike will arrive on time and undamaged.
Despite the extra legwork, an interstate purchase can still be an interesting and rewarding experience that opens up a massively larger market of potential new toys. Spend some time on www.bikesales.com.au or www.gumtree.com.au and see what’s out there.
About the author
As a passionate adventure traveler; Tony Friday has crossed the Sahara, surfed a volcano, barreled down an Olympic bobsled track, been caught in several war zones, and stayed as the guest of an African king whilst visiting more than a hundred and fifty countries by motorcycle over the past three decades. He enjoys sharing these experiences with other travelers, and is easily bribed with a cup of coffee.
Support vehicles and trailers for ATV group rides.

Contributor - Peter Jacobs
If you ever want to experience what your Mother went through, try being the support crew for a bunch of ADV Riders. You will get incessant nagging (“I need fuel, I need fuel”), be totally ignored (“who’s got my 10mm socket”), have to put up with endless embellished stories of bravado and Dakar class riding tales (from rank amateurs and wannbe’s), soothe damaged ego’s, re insert spat dummies back where they were ejected from, and maybe even administer a few band aids.
If that doesn’t put you off, you will have a ball, but there are a quite a few things to consider to ensure everything runs smoothly, and the entire crew get to enjoy themselves, focusing on the ride, and not inconveniences that could have been easily avoided:
1. Planning
2. Vehicle set up
3. Support equipment
4. Recovery equipment
5. Communication
Planning
The more effort put in up front at the planning stage, the easier and more organized (enjoyable) the trip will become. What is the route, days or distance, how many riders (do you know them all?), what is the level of experience in the group, what bikes, fuel range, where will the group be staying (camping or pubs/hotels), what terrain/temperatures are you expecting, and who is in charge? Just a few of the questions that need answers!
The larger the group the more structured the plan needs to be. A group of a few (maybe up to six) experienced riders can “wing it” to some degree, but once you go over that number you will need a designated Lead Rider who owns the ride, and makes the important calls when needed. Democracies definitely don’t work with large ADV groups.
Once the rough plan has been formulated, the Lead Rider has to take charge and organize/delegate who needs to do what in the planning stage (and there is plenty to do). If possible, some pre trip meetings over a meal and a few drinks are a good way of making sure everyone gets to know each other, and understand the ride early in the planning stage, and whether it will suit their skill and personality.
A larger group will only travel as fast as the slowest rider, so if some riders are used to being on the gas, they are probably better off with a few mates of similar experience on their own ride. The larger the group, the shorter the distance covered each day, and the more patience needed by everyone.
The Lead Rider plans the route, distance covered each day and where the stops will be. Throughout the entire process everyone tasked with planning and supporting the ride should have contingencies.
What if the weather takes a turn for the worse and roads get closed, what if someone gets hurt, what if we lose a rider or two, what if a planned fuel stop is out of action? What if, what if, what if.
An email group should be set up so everyone is kept up to speed with the planning process, changes and request for help or assistance with getting the ride/route sorted. Compiling a spreadsheet early in process will answer a lot of questions that will get raised before the group heads off. Below is some of the information that should be captured on the spreadsheet.
Rider name
Contact number
Emergency contact name/relationship
Emergency contact #
Any special medical issues – e.g. diabetes
Special skills – e.g. mechanic, paramedic, sparky
Emergency communication devices carried
Bike make
Bike model
Tank size
Range on full tank (km)
Chain size – e.g. 520/525
Front tyre size
Rear tyre size
Try and get a financial commitment (to help cover the support costs) from each rider to secure their spot on the trip, early in the proceedings. This will sort the wheat from the chaff, and make someone think twice about dropping out at the eleventh hour (and denying someone else the chance of a spot).
It is also a good idea to make a small laminated list of everyone’s phone number and emergency contacts along with important numbers such as RFDS, Main Roads, AMSA contacts, local Police stations and regional hospitals. If the group gets separated for whatever reason, everyone should have a full list of emergency and pertinent (other rider) contacts on them.
Each rider needs to be responsible for carrying all their own gear, with the exception of spare tyres and some common tools such as cordless angle grinders, drill, impact wrenches etc. If a rider needs to peel off and head home for whatever reason, they will need to carry their own camping gear and basic tools/spares and do so unsupported.
Support Vehicle Setup
It goes without saying that a support vehicle should be capable of completing the route, be reliable and roadworthy. The capability of the support vehicle should be fit for purpose with the planned route, but as we are talking about an adventure ride, a high ground clearance 4 x 4 should be the minimum (not an AWD drive vehicle). Even if the planned route is an easy one, you never know where the adventure might take you, and the shortest route to get emergency help, spare parts or medical assistance might not be the route originally planned.
The driver should know their vehicle well (i.e. don’t just borrow a mates 4wd), be competent with a 4WD, handy on the tools, and have the patience of Jobe! The support vehicles need to be serviced and capable of handling the support gear (trailer, food, extra fuel etc). Tyres (including spares) need to be in good condition and capable of traversing the planned (and unplanned emergency) route.
 As a minimum, spares for the support vehicle should include:
At least one spare tyre (preferably two) Consumables spares such as WD 40, Brake cleaner, Loctite, electrical tape, nuts and bolts etc. All jacking and tyre changing equipment (including jack plates) Recovery equipment – Maxtrax, snatch straps, soft shackles, long handle shovel, spade and preferably a winch
A puncture repair kit Comprehensive first aid kit including splints and a detailed guide to manage injuries. A portable compressor (for car and bikes) A multi meter Comprehensive tool kit (for bikes and car) Handsaw to deal with fallen logs on roads
Cordless power tools – angle grinder, drill etc.
If you have a 3 bike trailer, you need room in the support vehicle for at least 3 passengers if their bikes are on the trailer (don’t forget how much room their riding gear will take up as well). If one (or more) have injuries, they could require additional room to rest an injured leg on the back seat. Single cab utes are not going to cut it for moderate to larger sized groups. Big groups (> 30 riders) will require at least two capable support vehicles and trailers.
If the support crew are tasked with catering for meals as well, this adds another layer of complexity and planning. Fridge/freezers will be required, and enough food to support the crew for the planned meals.
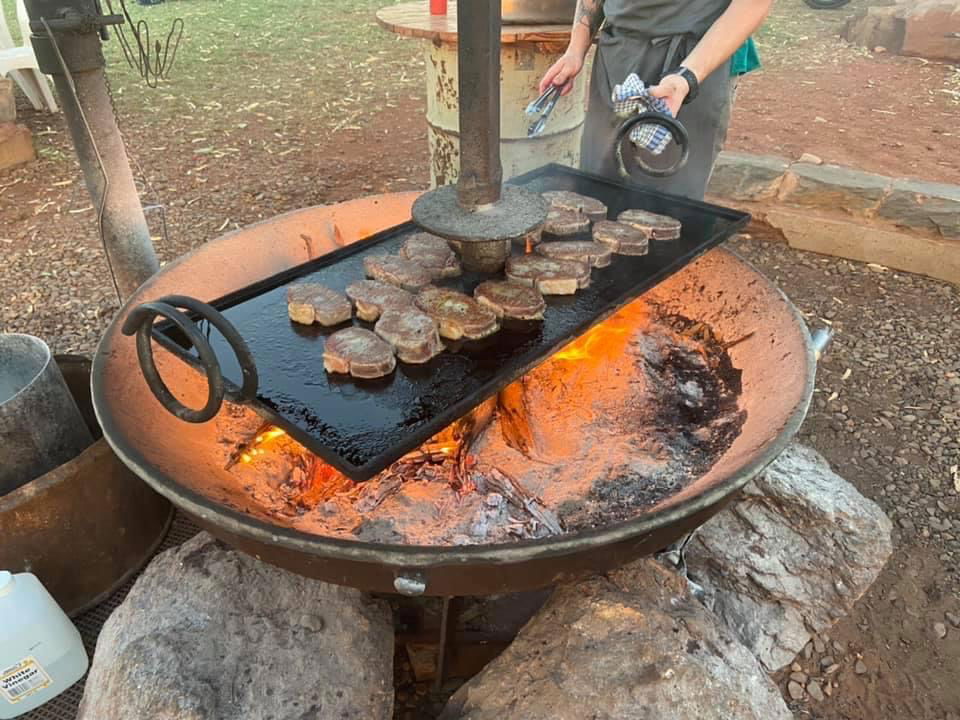
Keep the meals simple and easy (quick) to prepare – the crew is here for the ride, not a culinary experience, so burgers and snags for dinner and bacon and eggs for brekkie. If anyone has special dietary requirements, these should be identified early, and planned for accordingly. Don’t be shy delegating – divvy the work up between the rider’s such as preparing meals, cleaning up afterwards and getting the fire going.
Riders should plan (and carry) their own lunch/snacks – muesli bars, nuts, dried fruit etc, to nibble on while refuelling, having a break or checking out some scenery.
If you find yourself responsible for a few meals, look at options along the way to resupply (general stores/supermarket) as opposed to taking everything from home base as you most likely won’t have room. Wraps make a great alternative to bread (easier to pack, longer lasting) for B&E breakfasts. Tinned beans and spaghetti are good bulk fillers, and don’t require special care. Paper plates and disposable cutlery makes clean up a lot quicker and easier.
Don’t forget the condiments (salt, pepper, sauces etc), washing up gear (and a tub), and cooking utensils (frypans, tongs, egg slice, cutting boards and knives).
Most ADV riders are on the wrong side of the BMI index, so you need to keep them fuelled up too as they usually consume more energy on a daily basis than their bikes. Muesli bars and bags of snakes are welcome sugar hit late in the day. DON’T skimp on the food unless you enjoy hangry, smelly, hairy dudes hanging around the back of your vehicle rifling through it, looking for something to chew on.
All riders should utilize a 3L hydro pack, but on a hot day, plan on a minimum of 6L of water per person per day (the support vehicle will need to provide the excess). For a group of 30 riders, that is 90L of additional water per day to support the riders. Support water should be kept in multiple containers; if you lose one (damaged or left behind), you still have options (and haven’t lost the lot). The “BPA free” 15L to 20L containers with plastic taps (Bunnings style) do a good job. These can be placed on the tailer during a fuel stop allowing the riders to top off their hydro packs while refuelling is taking place.
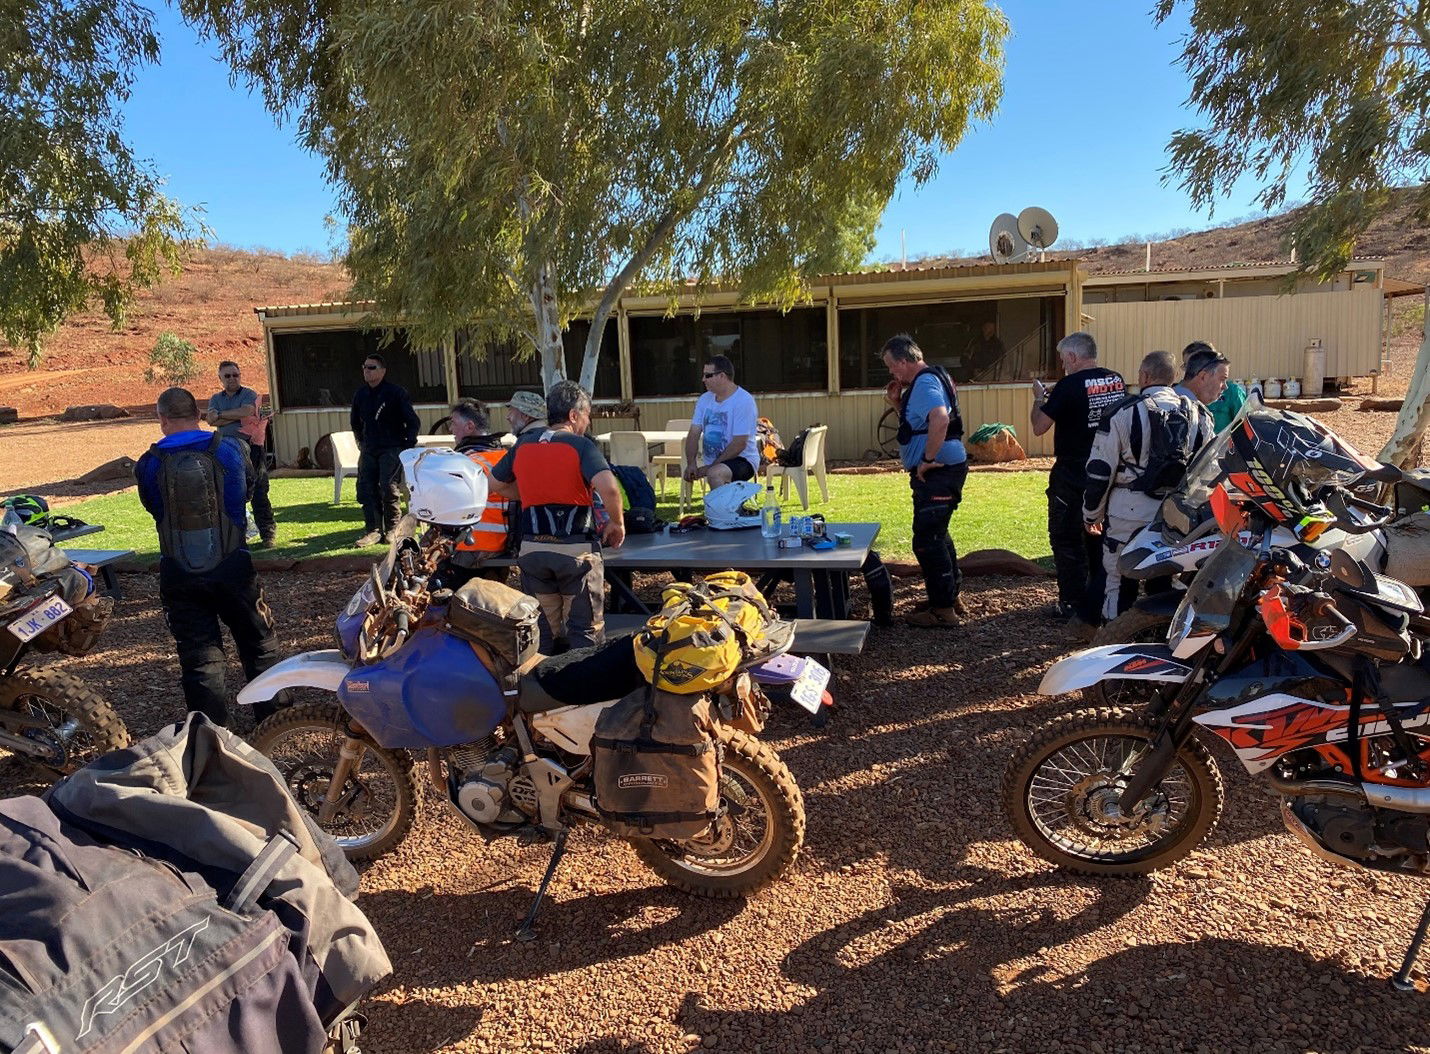
An awning on the support vehicle is an added bonus. This can provide welcome shade and shelter on hot and cold/wet days for the team.
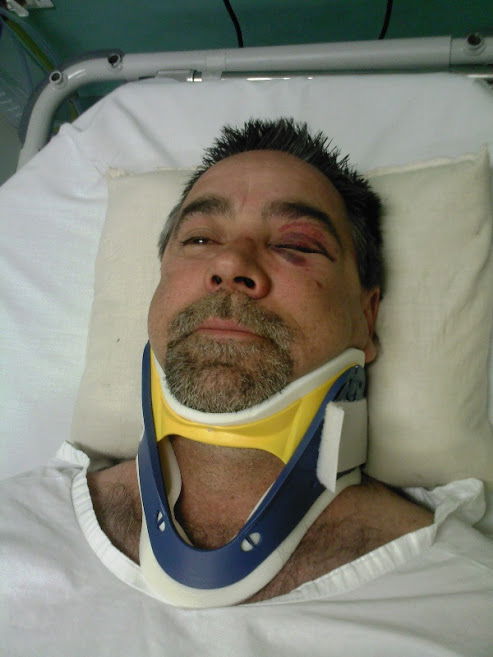
In the pictures below, one of the riders collected a kangaroo at 100kph and sustained serious life threatening injuries. The awning provided some welcome shade keeping him as comfortable as possible while waiting for the emergency services to arrive.


Support Equipment
Once again, the level of support equipment will be dictated by the size of the group. If bike trailers are in use (more than one for larger groups), they need to be in tip top condition. You don’t want to be the guy that has to explain to three riders why their combined $60k of ADV bikes are cactus because the A frame on the trailer failed, and everything ended upside down in the ditch.
Bike trailers need to be licensed, manufactured by a reputable company (compliance plated), fit for purpose and sized for the support vehicle. The trailer should ride level behind the support vehicle (not a 6 x 4 rental box trailer behind a jacked-up Dodge Ram) and have rated safety chains and shackles. Any trailer over an ATM of 750kg will require electric brakes.
You should thoroughly inspect the trailer before the journey. Most trailers are built to a price, with basic componentry. If you are planning a harder route, the trailer needs to be capable of completing the journey fully laden (bikes, fuel, water and whatever else is required) and still be within its engineered/registered ATM.
Trailer tyres need to be in good condition, and rated for the expected loads. Tyres are illegal once they are over 5 years old, so make sure you check the mfg date on them. You need enough spare tyres for the trailer(s) and some means of repairing flats (new tubes and plug kits). Wheel bearings need to be checked (ideally replaced), and re packed with grease before the trip. If you are replacing the wheel bearings, and the old ones are still in reasonable condition, re pack them with grease and bring them along as spares. It is a good idea to bring spare hub seals and wheel studs and nuts for the trailer. These inexpensive components are cheap insurance.
Check all critical welds on the trailer such as the A frame, spring hangers, hitch etc for cracks or excessive rust. The hitch should be in good condition, and if extreme conditions are expected, an articulating offroad hitch should be fitted.
Trailers are notorious for ricocheting rocks back onto the rear windscreen of tow vehicles, shattering the glass (more so with wagons). A perspex safety barrier from companies such as Plasweld will save your rear windscreen, and a lot of heartache and expense!
 Room for one more on the trailer
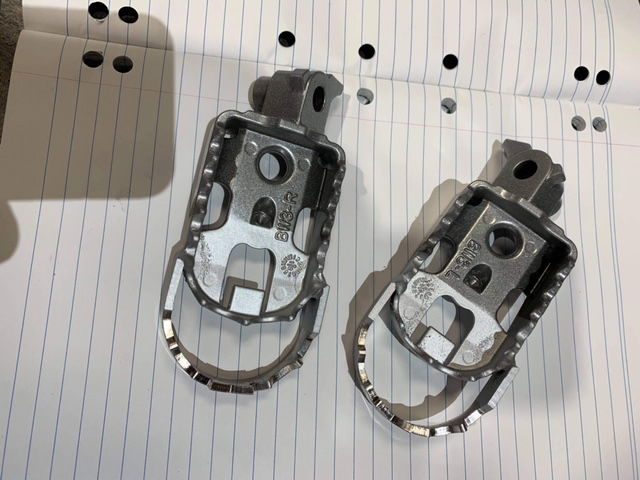
 Running repairs to a broken foot peg after an off forced the bike onto the trailer
 Exposed trailer wiring (not protected inside the trailer frame or a robust conduit) will be shredded on day one of an offroad journey. Rear lights will also need to be protected from rocks kicked up by the trailer wheels.
Bikes should be easy to get on and off the trailer. Having to wrestle a large (>200kg ADV bike) on the trailer without the help of (an injured?) the rider is not going to be much fun. You should have rated anchor points on the trailer, and a system that will allow quick and secure tie down of the bike. The tie down system should be sorted and known before it needs to be used.
Ideally, the trailer should be able to carry the required excess fuel for each leg of the journey (you don’t want fuel in your tow vehicle). The most common and convenient mode of transport is metal (plastic fuel containers swell excessively in hot weather) 20L jerry cans. For larger groups, you should have 3 x 5L “decanting” fuel containers per support vehicle/trailer. These will allow you to get 3 riders refuelling via the 5L containers and then provide the 4th rider with the remnants (5L) in the original 20L jerry can. By the time the you have dispensed the last of the 20L jerry can, the first guys will be back with their 5L “decanting containers” to start on the next 20L jerry for other riders. This system allows you to get 30 plus riders refuelled and stocked up on water in less than 30min. Put the 20L water containers on the trailer so the riders can help themselves to replenish their hydro packs after they have refuelled. A few bags of snakes/dried fruit handed around, and you will have a bunch of happy campers!
 3 x 5L fuel cans on rear of the roof rack for easy access to decant fuel from 20L jerry can (on bike trailer)
7 x spare tyres on roof rack, note also snorkel filter with (daily) sacrificial pool sock
Recovery Equipment
The support vehicle(s) should have an adequate set of recovery equipment for the planned route. This could include Maxtracks, multiple jacks (OEM and bottle jack), long handle shovel and shorter spade, snatch straps and rated shackles, and handsaw (for fallen tree’s).
Being able to air down/up quickly is paramount for the bikes and support vehicle when track conditions change. A high capacity portable compressor, suitable inflation line, and accurate tyre pressure gauge will be required. If the compressor can keep up, a twin line (T piece) will speed the process for multiple bikes.
Depending on the planned distances and number of bikes, it is worth considering taking along some common sized (21”/17”/18”) spare tyres (in good condition) to suit the fleet of bikes. If riders have a unique tyre size, they should bring a spare (for their specific bike), as it will be difficult to get a replacement in remote areas.
Communication
This one can’t be over emphasized. By definition, an adventure ride is most likely going to stray from many of the things we are surrounded by during our regular daily grind (and thanks god for that), including connectivity and easy access to medical resources.
One component of the rider details/equipment/fuel planning spreadsheet should capture who has what emergency communication equipment – PLB’s, Sat Phones, Spot trackers, InReach/Zoleo etc. Many ADV rider’s have their own favourite devices, and prefer to travel with these (personal peace of mind) regardless of what other systems the larger collective group has. Equally important to the hardware is knowing how to use it – and not just the owner/rider, as they could be injured. As a minimum the support vehicle should have a Sat Phone, UHF radio, PLB, GPS device and mobile phone (and the driver needs to know how to use them).
PLB’s need to be registered to the owner/user and recorded with the Australian Maritime Safety Authority (AMSA).
www.amsa.gov.au
In addition to electronic navigation aids, a good set of paper maps should also be carried by the support vehicles. These are much better at providing a broader spatial overview of the route (and alternates) as opposed to a small electronic screen. Large paper maps give a much better perspective of relative proximities.
Be sure to understand what coordinate grid your GPS and paper maps are using so this info can be communicated to emergency services if required.
You will need to have all of the correct charging cables for each device. Beware of tablets and non ruggedized consumer products, as they can suffer from heat degradation, and are difficult to read in bright sunlight.
Make a list of key emergency numbers for the planned route, and put these onto the laminated rider list (emergency contact details) all participants should be carrying with them. This should include:
Regional hospitals Regional Police Stations RFDS bases
AMSA contact details Main Roads Department Nearby Roadhouses.
The support vehicle driver(s) should brief the lead rider (and a few trusted others) on what communication equipment they have in their vehicle, where it is located, and how to use it (just in case the support vehicle driver becomes incapacitated). Keep a quick start/setup guide for each device with the specific unit in its protective case/bag.
Once the trip has been planned, encourage all riders to share it with their partners/family/close friends so they have an idea of the route, intended/planned overnight stays, and where/when (day/date) the group may be in mobile phone signal. If there is an emergency at home, it is important that family and friends can get a message to the group.
Costs
Support vehicles provide peace of mind and security to an ADV ride. There are many that believe an ADV ride is exactly that – rider and bike against whatever is thrown up at them (and this is fine). However, many people are on tight schedules with limited time off work, and the availability of a well-equipped support vehicle makes a lot of sense to focus on enjoying the ride without the worry and hassle if things go pear shaped. Costs will obviously depend on the distances covered, but a larger support vehicle laden with food, spares and water, towing a bike trailer with fuel will consume up to 20L/100km of distance travelled. For a 3,000km journey, with fuel averaging $2.00/litre, this equates to around $1,200 in fuel costs alone. This is over and above the wear and tear the owner is putting on their vehicle – often for quite a few people that don’t know all that well.
What has worked well in the past for Perth Adventure Riders (PAR) is each rider paying a “levy” to cover the costs of the support vehicle, accommodation for the driver (when available) and to purchase food for whatever meals the support crew will be catering along the way. With a group of 30 riders chipping in $300 each, this provides plenty of scope for multiple support crew to do things properly, and even leaves a few dollars over for some drinks or pub meal at the end of the trip. Considering most “commercial” tours would charge upwards of $5,000 for a supported 10 day ADV ride, this is a very economical means of providing top notch support, and peace of mind for a large group to ensure they keep moving.
So what are you waiting for? Stock up on a few spare dummy’s (for the ones that will invariably spat out), grab some bandaids and spare 10mm sockets, practice your deep breathing calmness routine and dive right in. You will form life long friendships and get to see the beauty of our wide brown yonder.

What gear do you need to take to deal with a flat tyre.
Contributor – Colin Bayman
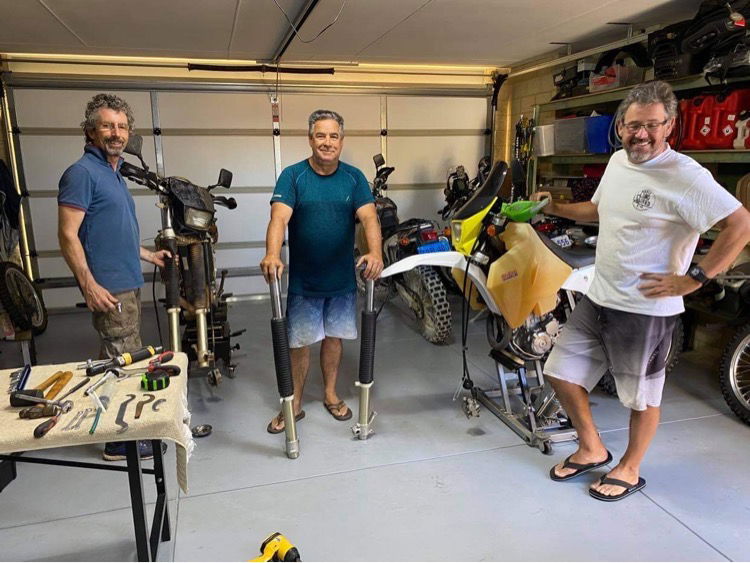
This is the kit for a spoked wheel with a tube,
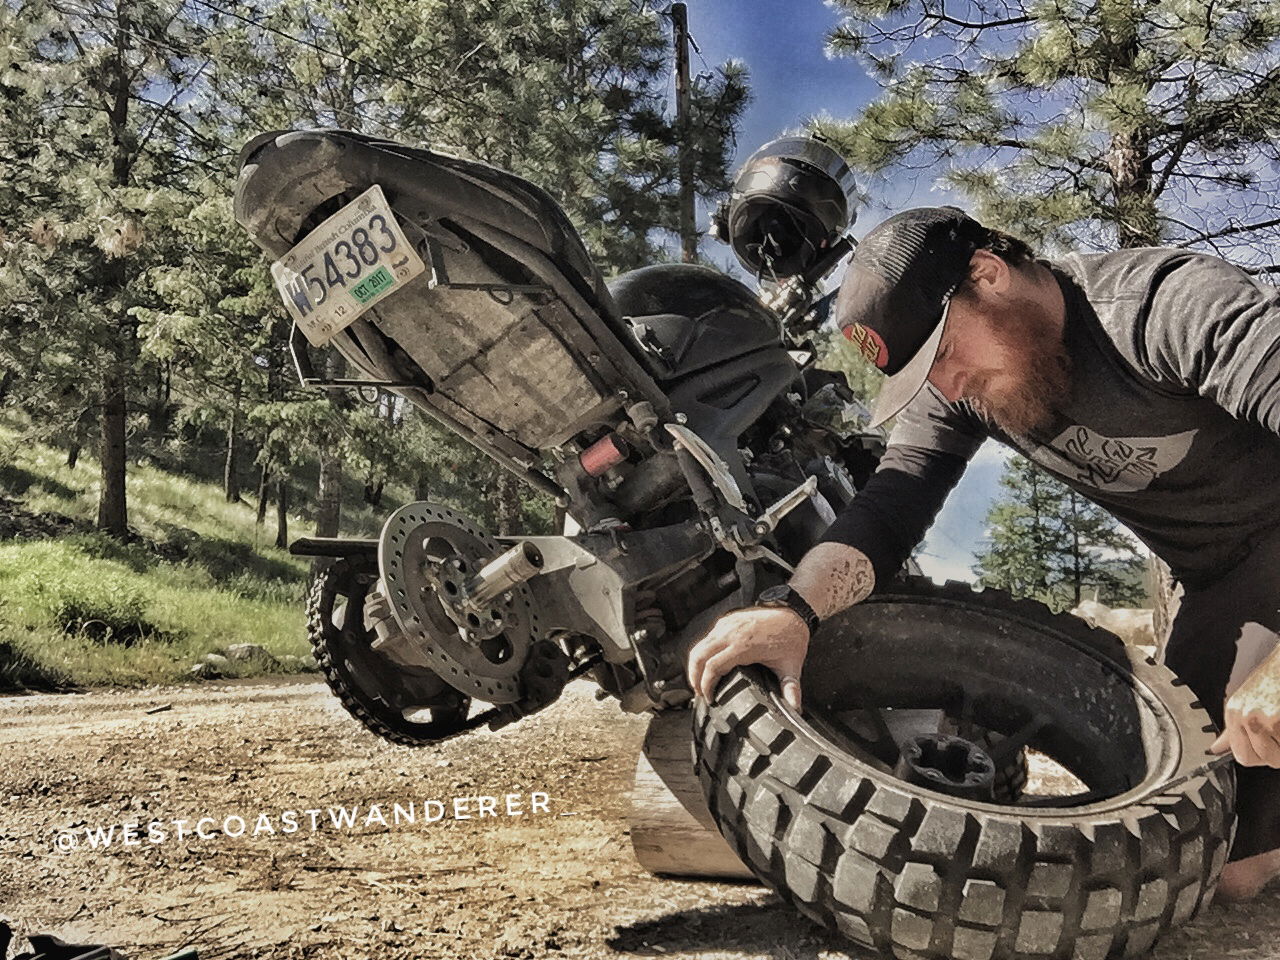
No one enjoys changing a flat tyre. You are having a great ride and all of a sudden, the bike gets a wobble and you know exactly what has just happened. If you are prepared and have had a little practice you might just be OK. This is what I take with me –
A spare front tube – fits both ends. On multi day rides I take a front and rear.
A compressor – You are going to need to pump the new tube up and get the bead back on the rim.
A puncture repair kit for multi day rides – You just never know!
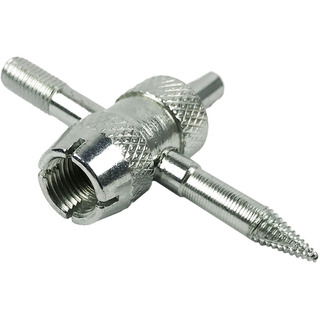
A valve remover – That valve is going to need to come out of the new tube so you can use the valve puller tool when fitting the new tube.
A valve puller tool – helpful getting the valve on the new tube inside the tyre and back down through the hole in the rim.
A Bead Buddy – This little helper will keep the bead down in the valley of the rim while you lever the tyre back on. This is often what makes getting a tyre back on and it looks like you will never force the tyre back over the rim.
Some bead breakers – yep you can use your mates side stand but you could be on your own. A rear 150 wide tyre is often hard to get off the rim so you might need some help.
A small plastic bottle – A little bit of lube goes a long way whether you are fixing a flat or have a hot date.
A very small tarp to work on to avoid dirt getting in the bearings and damaging disks etc. Cut a 1 meter square out of an old tarp.
A trail stand – Keeping the bike upright and steady with a wheel off is important. Having a loaded adventure bike fall on you is not going to be fun. A center stand will pick up the rear wheel but not the front one.
A Jump Start Kit- Compressors draw plenty of power (blow fuses) and small connectors get warm with prolonged use. Fit an Anderson plug to the cord on your compressor and plug it straight into the jump start kit for 50 Amps of power.
Some take a little less and others take a little more. I suggest practicing at home using the tools you will carry on the bike. Working in shorts and tshirt in the cool of your carport has got to be easier than in the sun and dirt fully kitted up. All the best.


This is the kit for a spoked wheel with a tube,
No one enjoys changing a flat tyre. You are having a great ride and all of a sudden, the bike gets a wobble and you know exactly what has just happened. If you are prepared and have had a little practice you might just be OK. This is what I take with me –
A spare front tube – fits both ends. On multi day rides I take a front and rear.
A compressor – You are going to need to pump the new tube up and get the bead back on the rim.
A puncture repair kit for multi day rides – You just never know!
A valve remover – That valve is going to need to come out of the new tube so you can use the valve puller tool when fitting the new tube.
A valve puller tool – helpful getting the valve on the new tube inside the tyre and back down through the hole in the rim.
A Bead Buddy – This little helper will keep the bead down in the valley of the rim while you lever the tyre back on. This is often what makes getting a tyre back on and it looks like you will never force the tyre back over the rim.
Some bead breakers – yep you can use your mates side stand but you could be on your own. A rear 150 wide tyre is often hard to get off the rim so you might need some help.
A small plastic bottle – A little bit of lube goes a long way whether you are fixing a flat or have a hot date.
A very small tarp to work on to avoid dirt getting in the bearings and damaging disks etc. Cut a 1 meter square out of an old tarp.
A trail stand – Keeping the bike upright and steady with a wheel off is important. Having a loaded adventure bike fall on you is not going to be fun. A center stand will pick up the rear wheel but not the front one.
A Jump Start Kit- Compressors draw plenty of power (blow fuses) and small connectors get warm with prolonged use. Fit an Anderson plug to the cord on your compressor and plug it straight into the jump start kit for 50 Amps of power.
Some take a little less and others take a little more. I suggest practicing at home using the tools you will carry on the bike. Working in shorts and tshirt in the cool of your carport has got to be easier than in the sun and dirt fully kitted up. All the best.
Steve Fraser's dirt bike reviews, Adventure Bike builds and Sheds Matter on YouTube.
Contributor - Steve Fraser
Reviewing bikes is a fun past time, the chance to climb on board some of the latest and greatest toys is always enjoyable. In my reviews I tend to focus on first impressions, I normally ride the bike for one to two days and focus on how the bike rides and how well it fits into its intended market segment.
There are so many great bikes out there, it can often come down to personal choice, skill level and what you plan on using the bike for.
I give honest feedback on each bike, if I don’t like something about a bike I will let you know, likewise I will tell you what I love about them. The good, the bad and sometimes the downright ugly.
Reviews -
KTM 690 Enduro R
https://www.youtube.com/watch?v=V3uQPlRvpgE
Gas Gas EC350F
https://www.youtube.com/watch?v=emLlYmbx4XE
Suzuki V-Strom 1050 XT
https://www.youtube.com/watch?v=ahik_pNA_EE
Adventure bike Builds
Suzuki DRZ400e
https://www.youtube.com/watch?v=IqersKK7Kec&t=10s
KTM 690 Enduro R
https://www.youtube.com/watch?v=QNdm8Vwu9yw
KTM 890 Adventure
https://www.youtube.com/watch?v=jV0jDfkOsaghttps://www.youtube.com/watch?v=jV0jDfkOsag
Sheds Matter
Colin Bayman's shed
https://www.youtube.com/watch?v=hC8JOX_A6_4
Motorrad Garage
Motorrad Garage has supplied aftermarket on and off road accessories to Perth riders and of course the rest of Australia since 2006. Coming to our showrooms in Welshpool or Sydney gives the impression that we sell bikes as well, as there are quite a few around but they are only part of our collection and offer themselves perfectly to display all the gear we sell.
Our range includes protective gear, tank and rear bags, side and rear luggage racks, soft and hard panniers, navigation mounts, hydration packs and much more.
The Motorrad Garage team proudly supports RIDE WITH ME members as well as Perth Adventure Riders and helps out with deals when ever possible.
You can find us at 1/108 Welshpool Rd Welshpool or online at www.motorradgarage.com.au
Which freight company to use to transport your bike interstate or regionally
Handing your bike over to a business to deliver your pride and joy to another state or regional area could result in a bad experience. A have contacted a number of people on Facebook pages who have recommended Bikes Only when the topic of transporting bikes interstate has been asked. Each of the responses was positive with comments including well priced and easy to deal with.
No one mentioned any damage, delays or general issues so I would imagine their experiences were more than positive. Dont we simply just want our bikes to be delivered in a timely manner and in one piece.
I jumped on Bikes Only website and requested a formal quote from door to door from Hillarys in Perth to Bondi in Sydney without the company knowing that I was only doing a bit of homework. I had a response the next morning (Saturday morning) providing the quote, conditions and all the links I needed to consider their company and following through with a booking if I wanted to.
I have since contacted them to let them know what I was up to and asked if they were happy to have their company promoted in this way. I will leave the decision up to you! This is the email response I received from my quote request –
Hi Colin,
Thanks for your enquiry, please find below the requested Quote for your Yamaha.
Our general transit times are below. If you would like to proceed please reply to this email and we'll get back to you with the latest available dates for your move.
Pickup from - Hillarys WA
Delivery to - Bondi NSW
Price per motorcycle - $ 953.00 (Includes GST & transit insurance)
* We also have a depot in each capital city and offer a depot to depot discount of $50, addresses are supplied on booking.
Please view our latest COVID-19 UPDATE as of 12/08/21
Frequently Asked Questions
General transit times: How long does it take to ship my motorcycle?
Sending additional items: Can I send other items with my motorcycle?
Transit Insurance: What insurance is included?
How to make a booking: Booking Process
Buying a bike from Auction: Auction Bike Regulations
Important Information:
Quotes are valid for 30 days
Dates are subject to availability upon booking
Please refer to our terms and conditions
Ready to secure your spot?
Simply fill out our online booking form: https://www.bikesonly.com.au/online-booking/
We'll contact you via email with your confirmation and payment details.
Still have a question unanswered? Visit our Help Centre to learn more.
Kind regards,
Sam | Customer Service
sales@bikesonly.com.au | www.bikesonly.com.au
Transporting your bikes for over 25 years
What's an AJP PR7 and who rides one?
 Contributor - Chris Shaw - Perth Adventure Riders
AJP PR7
THE STORY BEHIND THE BIKE
AJP might be unknown to many, but the brand has been around for three decades. It was founded in 1987 as a motorcycle repair workshop in Portugal by seven-time Portuguese enduro champion António J Pinto who then ventured into producing enduro bikes.
The PR7 was previewed as a prototype in 2014 but took almost three years to hit markets around the world. It was originally fitted with the Italian-made Minarelli engine (which has long been at the heart of Yamaha’s XT660R, X and Z Tenere models) but was changed to the six-speed SWM engine (basically the Husky TE630 motor) before going into production as the five-speed Minarelli did not meet global emissions requirements.
THE STORY BEHIND ME GETTING ONE - the magical Unicorn
I have been watching with interest the development of this bike since the original prototype and before the first batch ever hit Aus. From the beginning it had always ticked all the boxes for what I was wanting – on paper at least. This little-known Portuguese brand seemed to be plugging a gaping hole in a section of the adventure bike market with a more rally inspired dirt-oriented machine.
600cc injected counterbalanced motor, 6 speed, Alloy frame, titanium exhaust system, 17litre fuel tank under the seat, long travel suspension, 310mm ground clearance, comfortable seat, slim ergonomics, std lithium battery, 165kg full of fuel, good brakes, cush drive rear hub, Samsung tablet as standard behind the rally fairing, and legs enough to do open roads easily.
I could never understand why the mainstream manufacturers weren’t already making this sort of bike. I still can’t. The adventure bike market is dominated by large, high tech, heavy 200kg plus monsters that are probably fantastic but quite simply not what a lot of us are looking for.
In 2017, a total of 47 PR7’s were bought into Australia and all sold on the east coast. Like any first-generation new model those bikes did have some issues. Basically, simple dumb stuff like brake line crimp issues, fork tube anodizing coming off on the inside, soft rear axles, undersized fuel filter, ecu cold start issues. I had seen that AJP had come good, and all the 2017 model owners were supplied new brake lines, new rear axles, new upper fork tubes etc. and AJP seemed to have the success of the bike at heart.
I decided by then that all the issues should have been sorted and the 2020 model now had Brembo brakes and other improvements, and I began to think more seriously it but was acutely aware of limited dealers, support, and parts etc but after all, it was only a motorbike and what I liked about it was that it was purposefully low tech without all the crazy electronics.
I was on a Victorian high-country ride in 2019 with 2 good mates and was able to have a look at one firsthand and talk to its owner. That had me convinced that I was looking at the bike that I had been waiting for and no major brand seemed to make. Knowing that those first 47 were the only ones to ever hit our shores, I rang the importer to see if any more were ever likely to come into Australia and as luck had it the first very small order only shipment was being prepared in Portugal and I had till the next day to decide. I obviously did. That was back in September 2019 and I ordered a 2020 model with the powerup kit as AJP call it, which is a different exhaust, higher flow airbox and different ECU map.
In January 2020, I took possession of Western Australia’s first PR7. Just buying one wasn’t all that easy, as I had to buy it direct from the importer in the crate and put it together and then take it and get it rego’d.
MY EXPECTATIONS and MY EXPERIENCES SO FAR warts and all
Build quality is excellent although the earlier models had some issues.
Having the tablet to run various navigation programs and other apps is trick.
I like the air intake up high at the front, basically a snorkel system. Easy to get to and I use a Funnel Web prefilter over the main cotton filter and its perfect and highly effective.
I love the under-seat 17 litre fuel tank keeping the weight low and the bike slim, and the fuel filler at the front rather than the rear, meaning that you don’t have to remove luggage to fill-up.
Forums keep telling me that the throttle is jerky, but I don’t see it – although admittedly I have only ever owned big single dirt bikes.
If I had to try and find fault it would be that the coolant bottle was a bit exposed and I soon modified the bash guard slightly to cover it. It could do with a better turning circle. Maybe I would like to lower the footpegs slightly to suit my height better but the under swept exhaust makes that difficult. I can’t think of anything else I would change or want.
Being part of a local Australian PR7 Facebook group has been particularly useful as there is a lot of shared knowledge and experience to be had. Fellow PR7 owner Chris Kirk has developed several fabulous PR7 specific products such as the radiator guard and the steering damper through his ADV Engineering business.
STUPID STUFF
Why is it called a 650 when it is a 600? Same reason the Husky’s were TE610/TE630 maybe. There is obviously something I don’t know.
MY ESSENTIAL ACCESSORIES
ADV Engineering radiator guard, steering damper using ADV Eng post and mount, Guglatec fuel pump filter sock, and the usual heated grips etc,
WOULD I BUY IT AGAIN?
Well at this stage the answer would definitely be a yes. In the almost 2 years since I have had it, I can easily say that so far, I am very pleased. Longest single ride on it was the 9-day Midwest PAR ride in 2020 through remote WA and it was like it was just made for it!
The new 2021 model, although not in Australia, is apparently a further improvement with a much better ECU making a smoother throttle, an new 8” tablet and newer color scheme. Unfortunately, I believe the Australian importer has closed and sadly there is no replacement currently.
UPDATE 3-9-21 - A new importer has just been announced AJPMOTOS Australia.
Chris 2021
Ride scale difficulty for RIde WIth Me outings
Organising a ride can be a daunting experience especially not knowing the capabilities of all riders. The last thing you need is to come across a few obstacles and a newish rider says he just cant do it. The scale below is a great guide to include in your invite to allow others to make an unformed decision.
It not enough to just say big bike friendly!!! Add some other comments like " must be able to ride gravel roads at 100 kph " or "capable of fixing your own flat tyres ".
Fell free to copy this guide and use it as you like -

It not enough to just say big bike friendly!!! Add some other comments like " must be able to ride gravel roads at 100 kph " or "capable of fixing your own flat tyres ".
Fell free to copy this guide and use it as you like -
Adventure bike fuel consumption
Adventure bike fuel consumption.
There are many factors that can contribute to your fuel consumption including head winds, sandy trails, tyres, gearing and a heavy right wrist. Many riders are asking this question to allow them to plan better for long distance rides and just how many litres they need to carry. The following is just a guide and possibly an average based on our experiences. We hope this helps you plan your rides.
Contributor – Colin Bayman ( 95 kg)
DRZ 400e –
Maximum kms achieved – Ran out at 396 kms
Fuel capacity – 17 Litre Safari tank
Gearing – 15/44 combo
Tyres – dirt orientated tyres
Carrying gear – panniers and top bag with camping gear
Type of terrain – Mostly gravel and dirt roads in reasonable condition travelling around 110 kph without a heavy hand.
Tenere 700 –
Maximum kms achieved – Around 320 kms
Fuel capacity – Standard tank
Gearing – standard
Tyres – dirt orientated tyres
Carrying gear – panniers and top bag with camping gear
Type of terrain – Mostly gravel and dirt roads in reasonable condition travelling around 110 kph without a heavy hand.
Contributor – Steve Fraser ( 88kgs)
KTM 690 –
Maximum kms achieved – 600kms
Fuel capacity – 33l
Gearing – 15:45
Tyres – Pirelli Scorpion XC
Carrying gear – Mosco Moto Reckless 40l
Type of terrain – Mostly dirt roads and fire trails mainly at higher speeds around 100kph
KTM 500 EXC six days –
Maximum kms achieved – 300kms
Fuel capacity – 17l
Gearing – 15:50
Tyres – Pirelli Scorpion XC soft
Carrying gear – Mosco Moto Reckless 40l
Type of terrain – Mostly dirt roads and single tracks, slower speed more technical riding.
Contributor – Damien Keygan (98kg)
Super Tenere 1200 –
Maximum kms achieved – comfortably achieved 420 kms, with a little in reserve.
Fuel capacity – 22ltr tank
Gearing – Factory shaft drive
Tyres – dirt orientated tyres
Carrying gear – panniers and top bag with camping gear
Type of terrain – Mostly gravel and dirt roads in reasonable condition, travelling around 110 kph with mix of throttle and cruise control on.
What upgrades have I done to my DRZ.
Contributors name – Colin Bayman
Not in any particular order –
Fuel tank – a 17 Litre Safari tank. Good for almost 400 kms fully loaded on dirt roads with a light throttle hand.
Seat – Seat Concepts. The standard seat is made of wood and just not the right shape to sit on all day.
Bars – Some high bend KX bars.
Bar risers – I don’t have any as I have an under bar mounted steering damper and that raises it 40 mm.
Grips – Pro Grip Foam Rally. Comfort all day with the vibrations taken out. Don’t waste your time with Pussy Grips. I don’t have grip heaters but I wouldn’t mind a set after having them on my other bike.
Bar protection – Bark busters.
Throttle body turned over to ensure the cables are long enough with the extra height.
Kick start conversion – When all else fails!!!!
Foot pegs – Pivot pegs with the Lee Greer extension.
Lighting – A full Britannia light and tower set up - Britannia Composites Ltd. – Composite Motorcycle Fairings and Cockpit Systems
Front guard – A YZ450 white guard to match the tower and just because I think it looks better.
Power outlets – usb and standard 12 v both part of the Britannia tower set up.
Gearing - a 15/44 combo. Quality ORIng chain and sprockets.
An aftermarket case saver is needed for a 15 tooth sprocket up front.
Muffler – The baffle has been removed to make a bit of noise.
Side racks – I bought them second hand and not really sure but could be an early Barrett rack.
Engine case protectors.
Top Rack – B & B top rack with B & B luggage rack. Roc straps to hold everything on properly.
Tail tidy – I have just cut the original one down and left the rest standard.
Indicators – I have tried so many without a lot of long term success. I have gone back to standard ones.
Jump start kit fitted with flush mount. With hundreds of these fitted to other PAR bikes power is not far away.
Suspension – Front and rear spring upgraded to hold my fat arse. Springs from Dynotime.
Tyres – a Pirelli Scorpion Rally up front and a D606 on the rear with HD tubes fitted and the front wheel balanced.
Side stand switch – Disconnected. Beware though, the engine won’t cut out if you try to take off with the stand down.
Carby breathers – Re-routed so the bike doesn’t take in water on a water crossing. This small mod is a no brainer with details on how to complete this free upgrade in another Q & A.
This is certainly not the only setup that you can try to achieve but it certainly works for me. A number of other PAR members have gone down this path and the feedback has been really positive. It turns a great little trail bike into a half decent adventure bike. I have done several multi day rides on mine and have done it with ease.
5 Things you need to know about satellite phones.
Motorcycle riding is dangerous and a good day out can go pear shaped in a moment. Unless you are on a main road and someone will actually find you within a short time then you probably need something to communicate with others. One of our contributors, Steve Fraser has put this together and its worth a read.
https://www.bikesales.com.au/editorial/details/five-things-you-need-to-know-about-satellite-phones-131655/
https://www.bikesales.com.au/editorial/details/five-things-you-need-to-know-about-satellite-phones-131655/
Best place to get boots, ride jackets and pants etc repaired in Perth.

Reids boot maker in Vic Park sold their business in early 2021 and had been the very best shop to go for more than 40 years. With new owners and a new name they are now at shop 2/912 Albany Highway East Victoria Park. Drop down and see how they can help. I have used them already to take up some adventure pants and were more than happy with their work.
Business Manager Krystal Hope said “Mention Ride With Me when visiting The Experts for an exclusive discount Discounts are applied depending on job size and type.”
If anyone else has alternative places who can do the heavy duty repairs of boots/jackets etc let me know the details and ill drop them up here.
Buy from the dealer or online.
Contributors name - Colin Bayman
You can often save a few dollars buying online. Its easy to push the 'buy' button sitting in the loungeroom searching for bargains on the laptop. Motorcycle riders can be a bit tight and you probably told your partner that this new found hobby wasn't going to blow the budget and the new $10,000 bike was just that.
You probably forgot to mention the extra 3 K to build the new bike into the stead you dream of. You are also going to need to kit out the new ride outfit and safety gear. Oh dear!! How are you going to get this past the Minister for Finance.
Your first thought is going to be to tell her that the boots at the bike shop are $475.00 but you can buy them for $425.00 plus freight online so you are really helping out by saving as much as you can. How could this possibly go wrong?
The boots arrive and you are pretty excited having already arranged a ride on Saturday with the lads. You take them out them out the box and they are beautiful. You try them on just to find these things are a size too small but after checking the return policy and freight charges decide you will give them a go anyway.
By Saturday afternoon you can hardly walk. You should have just worn your old worn out Fox Trackers with a buckle missing because at least they fitted. Now you have to go home and tell the the Minister you have made a mistake. What will she say?
After a few heated discussions they are put up on PAR buy and sell for $380.00 describing them as only used once and found them a bit tight!! You finally get an offer for $350.00 but this guy is smart enough to come around and try them on with a pair of thick socks.
Now you have a choice to re-order another pair in the next size and hope that your next purchase works out a little better or you bite the bullet and pop down to the local dealer who has 50 pairs in stock and doesn't mind how many you try on until you get a pair perfect for your foot shape.
This same scenario goes for many items especially helmets and most safety gear. But lets say the purchase did actually fit and you were as happy as a pig in shit until something broke. Again, back to the returns and warranty policy to find it will take weeks and all freight is at your expense.
I have heard the stories over and over again. Yes the dealer appears to cost a couple of dollars more but that's only until you have formed a good relationship with them. My dealer looks after me and provides my family and ride buddies with great discounts. They are willing to price match whenever possible and do everything they can to ensure we keep coming back. A problem with any item is a simple trip down the road and dropping it on the counter with a discussion about what has gone wrong and it is always fixed to keep everyone happy.
I'm not saying I don't buy anything on line because I do and I also sell gear online. If I'm in the market for something the dealer doesn't stock I first have a chat to see how they can help before searching myself. I have plenty of examples where my dealer has been able to source after market parts cheaper than me buying directly or dealing with a 3rd party. Ask first for the big ticket items like big fuel tanks, racks, steering dampers etc.
Just check out the buy and sell pages for all the crap purchased online that didn't fit, wasn't fit for purpose, was simply poor quality or design. Buying bike gear is like building a pergola. Measure twice and cut once. Buy quality gear the first time that is fit for purpose and has a warranty.
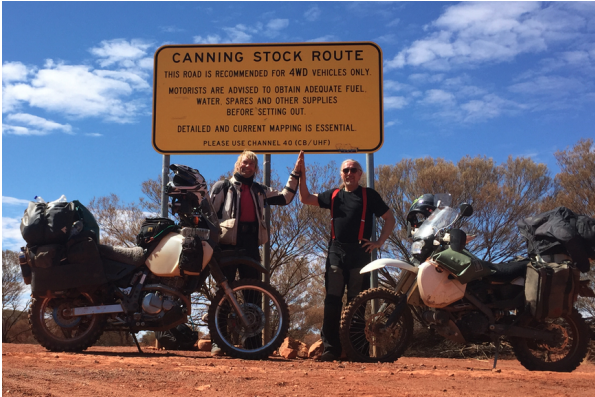
Thinking about riding the Canning Stock Route?
The Canning Stock Route
Forward
Dirk Schoendube and I had just returned from a 2000km round trip out through Norseman along the Old Telegraph track out to Balladonia.
Then from Cocklebiddy we headed direct North up to Warburton along the euphemistically titled “ Connie Sue Highway “. From there we met up with 60 odd riders at Desert Raid 2019 ( where I met the yet-to-be YouTube famous Rozalyn Konstek Veesma ). Then up the David Carnegie, down the Gunbarrel and back home through the Helena Aurora ranges. Home for only one day and feeling restless. the phone rang and it was Dirk.
“Mark, I think we can still do the Canning Stock Route ! But we should leave next week because it’s getting warmer“. Dirk is German and one of the best riders to ever throw a leg over a DR650. And so began our journey up the Canning Stock Route in late August 2019. We returned home via the Tanami, undertaking repairs in Alice Springs before returning via Mulga Park Road to Warburton and then down the GCR to Perth. About 7000km in 25 days. Here’s my two bobs worth about riding the Canning Stock Route unsupported.
( except for good fitting jocks )
 Unsupported
Unlike the Kiwis who think it’s a competition, West Aussies know that this is one of Australia’s most challenging off road journeys, especially on a motorbike and without a support vehicle. This article aims to cover some of the do’s and don’ts so that you can get out there, have some fun and come back in one piece. It’s the longest stock route in the world stretching over 1700 km between Wiluna in the south and Billiluna on the Tanami Track. The track was created in 1910 to connect some 51 wells for watering cattle en-route to the markets.
Permits
Go to https://permits.canningstockroute.net.au as you will need a current permit to make the journey. Permits are not being issued for 2021 so keep an eye on the site for updates as to when it will open again.
 Fitness
I’m putting fitness front and centre. If you really want to enjoy the journey you should give your fitness a lot of thought. Whatever exercise and dietary improvements you can implement to improve your health is up to you. Make no mistake , this is a serious undertaking. Over 900 sand dunes on a fully loaded bike and endless challenges. Especially work on your core fitness and flexibility. You’re going to need it when you’ve picked the bike up fully loaded out of the sand more than one time.
 Format
The best way to do this trip is to take two bikes for safety reasons. Any more and you’ll be riding in another bike’s wheel track. Trust me, this is something you want to avoid as another bike’s track will steer your bike for you. I rode on the right while my mate Dirk rode on the left. If you have the luxury of a support vehicle you could have four bikes. Two in front and two behind the vehicle so nobody rides in bike tracks.
 Safety
Lots of sand dunes means lots of blind crests. Best way to deal with that is UHF radio, Channel 40 is the recommended channel. Leave it on and listen for any vehicles. Most people are keen to not stack it so broadcast their approach. Also with 2 UHF’s you can communicate with one another. Unless you lose your handset ( Dirk ! ) Personally I carry a PLB ( Personal Locater Beacon ) in my pocket so if I come off the bike all I have to do is push a button.
For communication I have a Garmin Inreach explorer on the bike which Bluetooths to your phone and is a satellite messaging device, no calls. With each message it sends a link to show the recipient where you are on a Garmin map.
Another tip here for those of you with roadside assistance. RAC ( WA ) has a premium package that covers you for $7000 worth of rescue per annum. However you can’t message them when you’re in trouble, it has to be a call. So get a mate back home to be your proxy. Give them your member number so you can then message them and they can make the call. They also have the map link to show exactly where you are.
First aid essentials for me include a good tourniquet, compression bandage for snakebite and some heavy duty painkillers. You could be waiting a while out here if anything goes wrong.
 Timing
We travelled South to North starting on 1st September. Whilst this meant that we were pushing into the high 30’s at the north end of the trip we had one critical advantage ( just luck we had no idea ! ) 90% of the traffic was travelling North to South late in the season. Most probably returning from the Kimberley. That meant that the sand dunes were chopped up on our downhill run. If that was the other way around you just wouldn’t make it. Full stop.
The complete window for the Canning is May to September. Either side of that temperatures are getting into the 40’s. No thanks. We encountered high 30’s which requires a summer mesh jacket and some mesh in your pants too. Hot days saw me dribble some water from the camel back down my singlet. Messy, but cool. Easily accessible drinking water is essential for this journey.
 Maps, Fuel & Water
Allow yourself around 12 days to complete the Canning. That’s by no means the fastest or the slowest but in my mind we’re there to enjoy ourselves, not to get on it. You may want to stay a day or two at Durba Springs because it’s so stunning. Get yourself a Hema Offroad package of Offline maps for your phone. Hema also has a specific Canning Stock Route hard copy map. Pack one of these also in case your phone dies.
The Garmin Inreach also comes with its own set of global maps. Whilst these are good on detail, they don’t scroll between different layers or different maps of the same area. Once you zoom out it becomes very difficult to get an overview. I do use it sometimes for detail that can be lacking on the Hema maps.
There are other map options but I still find Hema the go to for best graphics and information that is legible and mostly well written. All maps however have blind spots or roads that don’t exist etc. Use your common sense when entering remote tracks. Are they private ? Should I be here ? Do I have the necessary permit ?
 Water
WaterThere are 12 Functioning Wells along the Canning. Hema shows which wells are functioning and potable. You could boil this water or use a UV purifier but we just used the smell & taste test and nobody was sick. Please note - water that smells OK may still make you sick.
 I carried 13 litres with me with an optional 10 litres extra if I needed. The 13 litres was fine. I had heard of other Adv riders almost coming unstuck on some heavily chopped up dunes and running low on water. We didn’t have that problem however. I had 1 x 8 litre Rotopax on the back, 2 x 1.5 litre bottles in my panniers ( Andy Strapz have bottle holders on the back ) and 2 litres in my backpack in a Camelbak bladder. From Wiluna the next available fuel is at Parnngurr Community ( Cotton Creek ). This is close on 900km.
With a bit of of sightseeing thrown in you need a 1000km range to cover the route. That equated to 50 litres on my G650X Beemer ! I had 2 x 12 litre bladders strapped to the bike plus the 26 litres in the tank. This community sells fuel but not on weekends so don’t show up on Saturday arvo like we did. The Community is an 80km detour off the Canning. For the first 400km of the route there is a fair bit of sandy and rocky terrain but no dunes. By the time you get to the dunes your fuel bladders will be empty and that is certainly a good thing because those first dunes will make you work every muscle in your body.
Everybody stops and has a chat and reminds you how many dunes are coming your way but nobody mentions the first dozen or so from the south are the worst. After I stacked it on the first three I was beginning to doubt my sanity as they are tough. You can’t do a fast runup on a chopped up dune so just paddle your way to the top. Things get easier the further you go so don’t give up. 15 psi was my go to pressure front and back. Dirk went to 9 and 12 psi on the DR650 ( aka Bush Pig ) as in his words “the front is like a donkey and the back is like a camel” hmmm that’s an interesting ride.
 CHOOSING AND PACKING THE BIKE
This track is not big bike friendly and it certainly doesn't like wide loads . Picture this.....You come out of a tight sandy corner after you make it down a dune and you have two deeply corrugated tracks in the soft sand ahead of you, a big soft mound in the middle and bushes and termite mounds at the tracks edge. So you get on it because of the corrugation, there’s a bush coming up that you’re not sure you’re going to hit so you go for crossing the mound in the middle.... whoa, get on the gas and lean back to straighten her out , panniers slapping the bushes, suspension and steering geometry wanna be good, bags packed as narrow as you can get them.
Start with a bike around the 150kg mark. By the time you’re loaded you’ll be pushing upwards of 250kg. With a support vehicle is a different story. I’ve seen Africa twins doing it on YouTube. We had 650 single dual sport bikes which in my mind are the sweet spot for this sort of journey, plenty of grunt down low where you need it. Don’t forget you have to get there and back too. As mentioned, bushes are close to the side of the track. You don’t want your panniers hanging out wide or you’ll collect a bush and that’s that. We also made some larger hand guards cut from heavy plastic and cable tied them onto our Barkbusters. You will need this extra protection !
Here’s a brief layout of how I packed : I had my 8 litre Rotopax on the back rack with my camping gear in an 80 litre Duffel bag on top. This took a fair bit of weight off the front wheel which can be an asset in sand. Strapped on with Rok Straps. Definitely the best way to hold your gear on. I carry a 3 man tent ( always room to throw your stuff in ) Nemo insulated XL sleeping mat with Sea to Summit large inflatable pillow. Sea to Summit down sleeping bag. if you’re going to be comfortable you need to spend your money on these items. What is a good night’s sleep worth ? Camp chair and camp table ( have a look on eBay for this stuff ) Fold up shovel and tomahawk, clothes and toiletries as well as Sea to Summit Saucepan, collapsible cup and bowl and gas cooker.
One side I have a 4 litre Rotopak for fuel with Andy Strapz panniers, these are pretty tough bags and they need to be as they get a flogging. Held down with Rok Strapz. Right side pannier for me has the following : Air compressor, 2 back tubes, one front tube, tools, clutch cable, cable repair kit, oil filter, chain link and front sprocket, tube puncture repair kit, Gaffer tape, cable ties, spare levers, air filter spray oil, mirrors came off at the start of the trip so stored them in here, fire starters, First aid kit, whiskey, beer, tow rope ( I use a boat winch strap as it folds up small and you can get this BCF ).
Towing tip : Wrap the strap around your foot peg only once with your foot on it. That way if you come unstuck the strap comes loose when you lift your foot off. There’s heaps more bits and pieces that I’m sure you can add to your own list. I have two tool kits on the bike. One up front in front of the motor and another in a document tube inside the back rack on the left I also keep my food on the left side. You’ll need food for about 10 days although you can buy supplies and fuel at Parnngurr, and also at Kunawarritji it's nothing flash but you will survive. For me the basics include Muesli, dry biccies, canned fish, olive oil, nuts, as much fruit as I can carry, some green avocadoes ( make sure they can’t get squashed. ) onions, garlic and spices also a coffee pot, coffee, honey, powdered milk or coffee mate.
I like Uncle Bens pre cooked rice as you don’t need water and they’re easy on the wallet .Don’t forget you’re carrying your rubbish out with you.
 TANK BAG
I wasn’t carrying a Tank Bag on this journey but couldn’t do without one now. Some contents : Garmin Inreach explorer, Lithium jump start battery ( I have an Anderson plug hooked onto the battery ) right angle tyre valve adapter, wet wipes, sunscreen, visor wipes, tyre pressure gauge, lighters, Leatherman or similar all purpose tool.
COMFORT
Some comfy bits for the bike: Comfy pegs up front bolted onto the front frame, fold back pegs. These can also be an engine and foot saver when you stack it. AirHawk cushion under lambs wool seat cover. How valuable is a comfortable butt ? Throttle lock. You won’t use this on the Canning itself but you need to get there and back.
I like a screen as well and I use a removable one on top of that for extra protection on the road. That about wraps it up for most things. Parnngurr to Kunawarritji is only about 250km. You can opt out of the Canning at both of these places too in case you’ve had enough. There were 3 guys heading off the track at Parrngurr when we were coming back in they were experienced adventure riders but they’d had enough. It isn’t easy so just remember fitness and bike weight are everything out here. Enjoy the journey.
Mark Hallett
August 2021
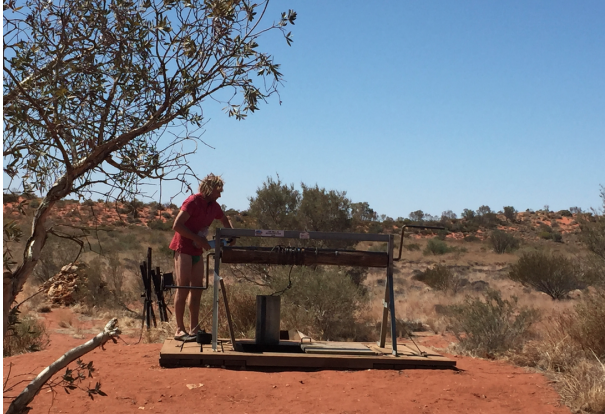
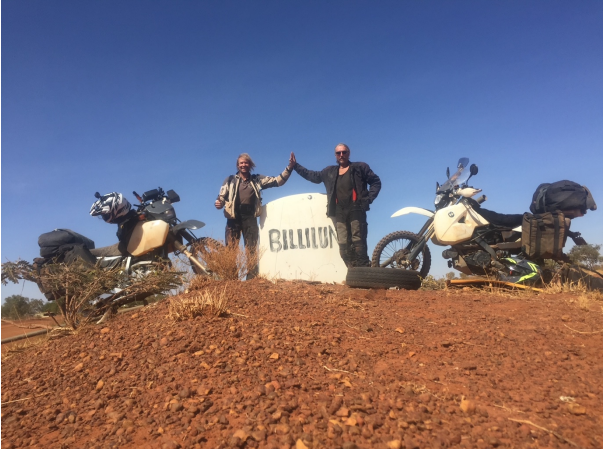
 Mark Hallett
What tyres should I choose?
Contributors name - Steve Fraser
Current Rides and Tyres -
KTM 690 Enduro R-
Pirelli Scorpion XC mid hard – I use these when I am mainly riding on the dirt as they provide good overall grip levels and are particularly good on cornering when pushing hard. They also have a decent wear level. If I am doing longer touring – i.e. more than a few weeks riding, I swap to Continental TKC 80’s they are a great compromise tyre, very predictable handling on and off-road and I can get around 5000kms out of the rear and close to 10,000kms out of a front.
KTM 500EXC six-days - Pirelli Scorpion XC soft – great no compromise off road tyre which are great in most conditions – (except wet roads on the bitumen). Don’t expect to get lots of miles out of them but that level of off-road grip comes at a price.
Kawasaki Z900rs - Michelin Power cup really nice tyres with quick warm up qualities, grip levels are fantastic the compromise is tyre life. Not the tyres I would recommend for road touring but if you are only riding occasionally for a blast on the tarmac then worth checking out.
Contributors name – Damien Keygan
Current ride and tyres
Yamaha Super Tenere 1200 ES MOTOZ TRACTIONATOR ADVENTURE front and Rear.
I chose these tyres for their excellent dirt abilities and longevity.
As I mainly use the Tenere for dirt touring, and only occasional commuting on tar, I find these give me a long service life. The depth of tread is quite large in comparison to other tyres I’ve tried, and on previous heavy bikes such as my F800GSA, I was able to get over 10’000k’s from a rear and about 5’000k’s from a front.
They also have an incredibly strong side wall if you like to lower pressures a lot. This is in comparison to the previous Kenda big blocks, which were done at about 5’000k’s.
On road they provide great grip for such an aggressive tyre although I always ride accordingly in the wet. They do produce a lot of noise on the bitumen but that’s a compromise I’m willing to accept for the off-road benefits. Off road these tyres track predictably, hook up well, and clear mud from the blocks easily.
Probably not the best tyre if you do an even mix of Tar/Dirt, maybe look at Continental TKC 70’s or Heidenau’s K60’s, but definitely worth it if you are more off road biased.
Contributors name - Colin Bayman
Current rides and tyres -
DRZ400 and the mighty T7
With a big increase in price of cheap tyres I have had to change my choice of tyres in 2023. The cost difference between a dirty old D606 and a quality Motoz has decreased significantly. I now run the same tyres on both bikes which are Motoz Desert HD tubed tyres.
Quality well wearing tyres that hang on like you know what to a blanket. Very easy tyres to fit and deal with on the trail which is an important part of the choice in the tyres. I only sell what I have used and recommend and now stock these tyres. I am actually riding my T7 much faster off road and with far more confidence on these tyres.
My take on adventure tyres is this, If you are going to ride long distances on the road to get to your off-road riding area then fit dirt tyres and don't compromise with a 50/50 or similar. You can ride a dirt tyre on the road but not a road tyre on the dirt. The only down fall with a decent off-road tyre is the road noise. I would prefer road noise rather than laying the bike down using some 50/50 tyres.
Contributors name - Glen Baker
Current rides and tyres -
KTM690 Enduro with a Karoo 3 up front and Pirelli mt21 rear. This combination offers good durability and reasonable off-road performance without suffering too badly when you want to use the bike around town. I have been riding the Karoo 3 front since Cairns, I cant believe it's still safe to ride on. The rear is due for a change and I'll probably swap out for the Scorpion up front and the rear which are a more off-road biased tyre now as I'm mostly on the dirt.
Triumph speed triple with a Kenda k784 Big Blocks. I was fortunate to have Kenda sponsor my ride around North America and I went through 4 sets of these tyres over the course of a year. I love riding with them on and off-road, although I did find them a bit soft compound for true adventure riding . Perhaps if I had taken it a bit easier on the throttle it would not have suffered that fate.
BMWk1200s with Michelin Pilot 5 which is an awesome wet weather road tyre. I have tried a few different boots for my street bikes but these are just perfect for the roads and style of riding I do. They are extremely durable and stick to the road like shit to a blanket. What more can you ask for?
How do I choose a bike.
Contributors name - Damien Keygan
I only have one bike based on my current financial situation and the amount of garage space I have. I tend to go through bikes fairly often (since 2016 I’ve had a BMW 800GSA, Tenere 660, and now a Tenere 1200 ) as it depends on what style of riding interests me at the time and where I am living. My current employment sees me move every few years and transporting/storing numerous vehicles is just too costly.
As WA is such a huge state with so much dirt touring I have chosen the Tenere 1200 because it is an exceptionally competent ADV Touring bike. It suits my exact needs right now for covering long distance on dirt/tar in absolute comfort.
It can carry as much, or as little as you want, and is unfazed by the large heavy traffic so prolific on WA’s road system, and stable in the strongest of winds.
If I could put a second bike in the shed I’d be very partial to a well sorted DRZ400 as it's easy to work on/modify and light enough for the tighter stuff. It is not totally horrible on the road for doing daily commutes or short overnighters and a great all round compromise type of bike.
Contributors Name - Colin Bayman
Great question. I currently have two bikes because I enjoy different types of riding and because they are yet to build the perfect bike that will do everything. My advice is to go off road orientated if you really want to get on the trails. My DRZ is fully set up for adventure riding, can handle the more technical riding and is much lighter and easier to pick up if I need to. The T7 is at home on the longer adventures and eats up kms in comfort. It's also very capable on fire trails and can be thrown around a bit in the bush.
There's no right or wrong but don't just get advice from one guy. Ride some different bikes and join groups and get out with them. My advice is to get something smaller and lighter to begin with and learn to ride off road and really throw the bike around before choosing a big adventure bike. I don't know many guys that have bought a 1000 cc Adventure bike as their first bike and have learnt to ride it well.
Contributors name - Glen Baker
I love off-road and the great outdoors but I do rack up a lot of highway kms daily by commuting many miles so having one bike just doesn't work for me. Hypothetically if I could only choose one bike to do everything from all the bikes I've ridden or owned I would choose the Tiger XCX. To me that was a road bike where I could happily ride all day and still feel confident tackling almost everything I would likely throw at it when touring the bush.
I don't do a lot of motocross or enduro anymore and now love the adventure of going long distances for weeks or months at a time.
At the moment I have 3 bikes in the shed. The KTM690 Enduro does most things quite well and it's at home when I am loaded up with gear riding through the bush but at the same time I can wash it and take out for day rides around town. The triumph speed triple is parked up but comes out on occasion just for short rides to the pub or cafe. My BMW k1200s is set up specifically for securely putting gear on and riding in the metro on tarmac. It has all the bells and whistles, you can ride comfortably all day on it and in any conditions.
Contributors name - Steve Fraser
I have worked out that for me the perfect number of bikes is four, although a few more at times is not a problem.
Number 1 – Skinny enduro weapon – Current bike KTM 500exc six days. A skinny enduro weapon that can tackle anything your ability can cope with. It’s a great bike for single day rides being lots of fun, super light and it will certainly get the adrenalin pumping.
Number 2 – An Adventure bike – Current Bike KTM 690 Enduro R
This is a very modified KTM 690 that I rode around the world in 2017 with a factory 450 rally kit fitted. This includes additional fuel tanks giving it 33l capacity, full factory fairing and seriously modified suspension with lots of rally raid mods. It is a bike that I can jump on tomorrow and ride around Australia on or just take out the back of Jarrahdale and just have fun exploring.
I prefer this sort of midweight adventure bike for off-road even though I have owned a number of big adventure bikes and at the end of the day, lighter is always easier for off-road.
Number 3 – A touring bike – Current bike Kawasaki Z900RS. This is a bike that likes to eat the road miles while being super comfortable and of course looks pretty cool. I have previously had a few big adventure bikes that I used primarily to tour on the road because they are so comfortable and when you combine a big motor with lots of nice features they are great on the open road. I tend to jump between an out and out road bike like the Kawasaki, and a large adventure bike like a KTM 1290 Adventure for the third bike.
Number 4 – A road weapon– Currently on order KTM 1290 Superduke RR. I love fast road bikes, some people never grow up. The insane acceleration and cornering ability just doesn’t get old. I have had Ducati’s, GSXR’s an RG500, MV Agusta’s and just about everything in-between. When KTM announced recently they were doing a limited run of five hundred very special versions of Superduke I had to have one. With a better than one to one power to weight ratio, close cartridge suspension, carbon everywhere, full titanium exhaust it’s little wonder they sold all five hundred in 48 minutes when launched in April.
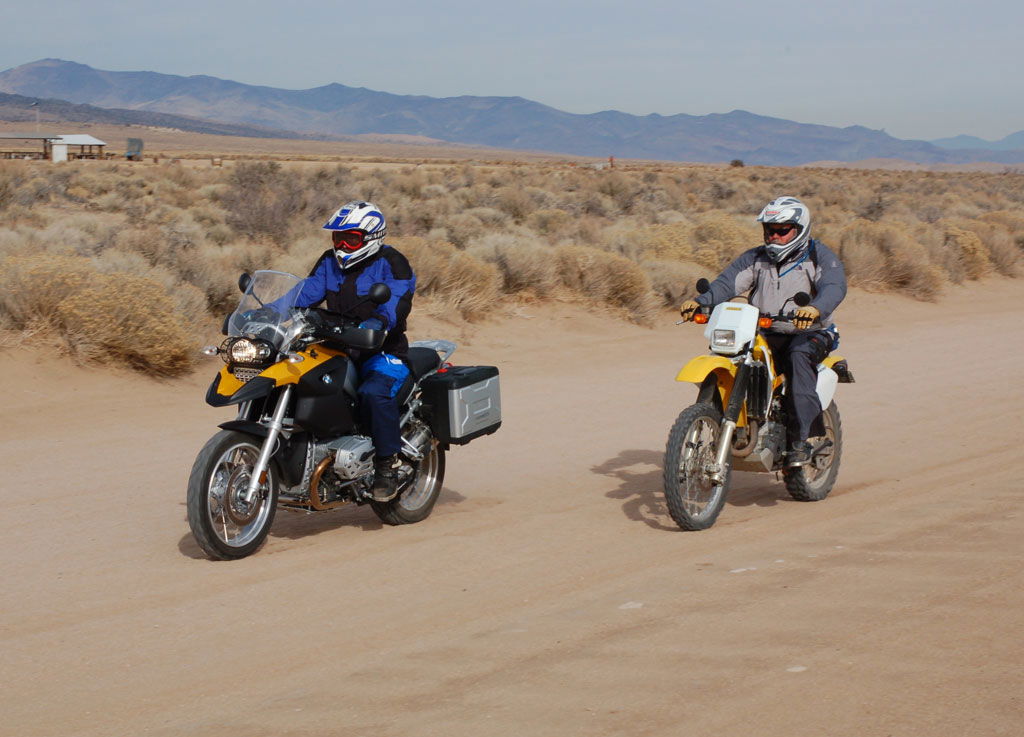
Bike groups or ride alone?
 Contributors name - Colin Bayman
I'm a very social guy and like all aspects of what groups have to offer. I enjoy the ride as much as the next guy but I also like the comradery that a bunch of people can offer. It helps my mental health stay healthy and I have found some amazing friends through bikes.
I do like an adventure but I also like the help and support of others on the trail. I do think any off road on your own has a higher level of risk. We all do it different so decide what you want out of your bike experience.
Contributors name - Glen Baker
I'm a very introverted person so I can naturally disappear on my own for long periods of time and often set off to ride entire countries on my own. Although I recognize there are times when I'd like to share some of those experiences and having the comradery of other friends uniting with the same goal is also hugely satisfying with the right riders.
I run and operate a motorcycle tour business which specializes in taking people to places which often aren't explored by tourists. I think this is a way for me to connect and share those experiences, and also pass down some of the knowledge learned as well as giving back to local tourism operators and their communities which is really helpful for a lot of the places we visit.
Finding the right balance for you is important. I like to ride slowly and stop often, take photos and talk to random people I run into. I can spend days in the same place occasionally making friends and learning about specific cultures. This can often be difficult with other people who perhaps don't have the same freedom of time.
Contributors name - Steve Fraser
I am most happy riding in a smaller group or occasionally on my own. I really enjoy being out in the bush with a handful of mates as I feel big groups are great but the risks do increase. If you are with five people that you know the abilities of you know what you are dealing with. If you ride with thirty five then you will have some great riders and some not so great. Things can go wrong very quickly.
I really enjoy getting to know people at a deeper level and riding more often with the same group helps makes this possible. It also allows us to give each other crap and no one gets offended.
Occasionally I really enjoy heading out on my own. It’s probably not the safest option (I do use a tracker) but this way I can cruise or blast depending on how I am feeling without worrying about putting the pressure on others or holding them up. I wouldn’t recommend it as a regular habit but occasionally I love it.
Contributors name – Damien Keygan
Hmmn? A bit of a tough one for me. I am a sociable person and enjoy meeting new people but not in large numbers and not all at once. I like to get to know the people I ride with and not have to try and remember 20 names over the space of a couple of days.
For that reason I prefer smaller groups of about 5 or 6 riders as it gives me a greater opportunity to make a better connection with the people I’m riding with. This also reduces the risks that tend to come with larger groups of accidents, mechanical issues, large groups spread over kilometres of track eating into ride time needing to regroup etc. It’s probably a little selfish of me, but I’m out to ride/explore and not spend 30 minutes waiting on a corner for 20 riders and the sweep.
I also love heading out bush alone for a few days as I find in today’s world it can be quite cathartic to just enjoy your own company. I like to set my own timetable and ride at my own pace as It’s good for my mental health. Being on my own allows me to stop for photos, make a brew and I don’t feel I’m holding anyone up while I'm doing my own thing.
I always have a route plan and contact routine when out by myself so if something goes amiss people will know quickly. I do this as I don’t have a tracker, sat phone, EPURB etc.
Cornerman system
Contributors name - Colin Bayman
The basic rule is... Ride in a group, stick to the system and someone will always be there to help you if you need it. Check out the video of a riding briefing before a ride.
https://youtu.be/bARKkRAEqu8
Unless you are riding in a small group with riders of similar ability and the tracks aren't too dusty it is best to use a system to avoid the group becoming separated. This can be done in various ways however my favourite has never let me down as long as everyone sticks to the rules. Remember, you don't want to be laying on the track with an injury wondering if help is going to come just because you ignored the basic rule.
The two main players in the system are the lead rider and the sweep. The group follows the lead rider whereever he may take them and he is in charge of placing a rider to show change of direction. He will give the that rider, known as the corner man, an indication that he wants him to mark the corner. That rider must stop and should park his bike in the direction the lead has gone. He should also use a hand signal to indicate the change of direction as well. This rider keeps this position until all other riders have passed by and the sweep arrives. The rider then takes off in front of the sweep and follows the group until he is back in second place again. He would then repeat the exercise again as many times as required.
Points to note -
The lead rider should explain this system to others at a riders meeting prior to the start of the ride. The lead is responsible for indicating when to show a change of direction. The lead should also stop and regroup every few km's and make sure the sweep arrives before proceeding. If possible, the sweep should wear a bright coloured top so he is easily recognized.
Never leave your corner unless the sweep arrives. If the sweep doesn't arrive then there is a problem that he is dealing with. The cornerman needs to hold his ground until the lead rider returns or the sweep arrives.
Once you are at the rear of the field you can overtake slower riders and work your way back through he field. Use caution when overtaking. Dont spray others with rocks as you jut past them or cause so much dust you they cant see.
If you are aware a bike is behind you, you can indicate which side you want him to pass by sticking your boot out on that side. If you want to stop it is good to use a stop hand signal and pull over to the left. Don't just jam the skids on in the middle of the track or you might end up with another bike on top of you.
Remember, this is not just for general safety it also ensures a good day of riding is had by all. There is nothing more frustrating than the group becoming separated and riders going in circles looking for each other. If you don't find each other you don't know if the other are OK. So if you want to ride in a group, please follow the corner man system.
How to navigate using an Off Line Map on your phone.
Contributors name - Colin Bayman

A couple of easy steps to plan a great day out on your bike using a free off line map on your phone.
Step 1
Go to the Here We Go website to do your planning. Using the bigger screen gives you a better idea of how this all comes together however if you have used these maps before go straight to Step 2.
Open the map and change it to Classic view on map view. Then go up to the search bar on the top left hand side of the page. Across to the right hand side of the search bar click on the two little arrows. This will allow you to type in a start point and a destination. On the start point type in Cole Road Sawyers Valley and select. Then go to destination and search for Whitegum Farm Caravan Park and select.
The map will choose a route, under this section you then need to choose 'bicycle mode'. This will take you the quickest route which will take in all the dirt roads you want to ride on.
Once you have this set up you can add more way points between the start and destination by clicking on the plus sign and adding further way points. Using my pic add in each of the points such as Flynn, Flint and Dale. It s that simple, you have now created a great route. This can be modified all you like by changing the way points. Look at your map and pic a road name instead of a suburb for a way point and try those. Now you know where you are going you now need to go to the next step.
Print off the map you have created and take it with you on the ride.
Step 2
Down load the Here We Go App onto your phone.
Down load the map of WA
Go to settings and change it to “use off road”
Mount your phone on your bars and turn the screen setting into brightest setting. Phone mounts can be purchased at Coast 2 Coast in Belmont Ave Belmont.
Ride to Sawyers Valley to the start of Cole Road.
You do not need to put in a start and destination now as you are already there. You just need to search for your first way point. Search for Flynn and select it. You will be given a number of choices based on your selections in settings. Turn off everything except dirt roads and bicycle mode. Choose the shortest route offered and click on it. Ride to that destination.
Once you arrive at Flynn you then repeat the procedure to navigate to each location. You can't store the entire route in the app so that’s why you take your map print off with you and navigate to each way point as you go. At any point in the trip you can navigate out by simply choosing the final destination or another town.
If you use the route I have shown above you will end up at a great location where they have a good restaurant for lunch and even a bar. If you want to throw your tent up for the night there is a good caravan park and they also have good cheap rooms available.
Don't take much notice of the time the App suggests it will take to make it to your destination. It allows for very slow speeds. This ride is only 2 – 3 hours for a small group riding at a reasonable pace.
Message me through the contact section on this site if you need more help.
What do you do for dehydration?

What to wear for adventure riding.
| Contributors name - Glen Baker What gear to wear is a very personal choice. I do encourage newer riders to wear the best gear they can afford until they build up confidence riding off-road and how your bike handles different terrains. Personally I wear only very basic gear when I'm adventure riding which I consider to be multi day riding most the time. When I'm fully loaded and camping in the bush I'm not going to ride crazy. Part of the adventure for me is to go long distances and manage myself and my machine so I can return safely. I like to prioritise comfort and practicality over protection knowing that I won't be riding aggressively. I also feel when I'm fully protected in all the armour I am more likely to feel invincible, and ride beyond my skill level, increasing my chance of an accident or breaking something on my bike. Typically I use a layering system which consists of an icebreaker base layer (merino wool) which breathes in the heat but also protects in cold. I use Klim Dakar pro outer layer and have an outdoor research helium rain suit for when it pours. If it is cold I have an outdoor research thermal jacket designed for technical climbing in the alpine. It's very flexible and comfortable but breaks the wind and keeps you warm whilst being light and dry. I also have the Leatt Airflex pro knee and elbow protectors which are comfortable , light and barely notice they are there. I wear Klim Dakar gloves and carry a waterproof pair with my wet weather gear which are easily accessible. Normally I wear my Alpinestar Scout boots which are comfortable and sturdy but also waterproof. My helmet changes quite regularly. Most recently I am wearing a dual sport helmet, visor, clear screen with a drop down tinted screen. It's a jack of all trades kind of helmet which you can use in all weather conditions. Contributors name - Steve Fraser All the gear all the time. If you want to save money buy a cheaper bike and spend your money on safety gear. As the old saying goes, a $99 helmet for a $99 head. The thing about buying really good gear is it will last you for years, I wore the same riding gear for 222 days straight (yes it did get a bit on the noise) going around the world and three years later it still has years of adventure riding ahead of it. Off-road I always use quality MX boots, they have saved me a number of times. Knee braces are also a must. If I am doing a one day ride then I tend to wear a MX helmet with googles and if I am doing longer rides then I use a adventure helmet with a visor for better wind and rain protection. I have moved to high end Gore-tex riding gear, which is very expensive but means you don’t need to worry about carrying wet weather gear. A high quality Gore-tex riding suits works well in all weather conditions and it breathes great in wet weather but you do pay for it. Make sure whatever you buy has great ventilation. Australia can get seriously hot and you don’t want to be tempted to take your jacket off because you are too hot. A hydro pack is a must too even on short rides. You never know when something will go wrong and you are stuck helping a mate in the bush for hours which is not much fun without a drink or snack. This happened to me recently riding with two other guys when something small turned into an all-day affair. It is not a matter of if its going to happen but when it's going to happen. Contributors name– Damien Keygan I’m a believer in ATGATT (All The Gear, All The Time). This was brought home when I took a spill on my Suzuki TL 1000. I had a good helmet, jacket, gloves, and boots. What I didn’t have was good pants, just some cheap cargo pants. Suffice to say, the resulting knee surgery and recovery was enough to convince me that tar is just as effective at grinding down bone as it is cotton fabric. The remaining gear did its job. The gear was destroyed but I wasn’t. Everyone has a budget when it comes to gear. My advice is to buy the best you can afford . Good gear is an investment and will last years if you treat it right. MX boots for protection and standing on pegs for extended periods off road, as opposed to the current crop of ADV type boots. I do however have a pair of SIDI ADV 2 Gore-Tex boots for winter riding if I’m just commuting etc. I cringe when I see riders without gloves as hands are the first thing to hit the ground when you stick ‘em out to protect yourself. I use RST’s adventure rally 3 suite, and rate it highly for comfort and durability, but removed the knee armour and wear knee protection under the pants as pads move with the suit, and probably won’t be on my knees when I come down on them. I find the waterproof inner and thermal liner to be more than sufficient for what I do although if you can stretch the budget, Gore-Tex gear and layering is probably the ultimate in weather protection. Hydration is important. I have several different camelbacks of various sizes depending on where I'm riding. I prefer goggles over sunnies or flip down sun visors which are common in helmets today because they are far better for dust, insect and object protection. Contributors name - Colin Bayman I don't think you can wear too much safety gear. I know we all have a budget but try to stay away from the cheap stuff. I prefer MX boots to adventure boots simply because they provide much more protection than adventure boots. I wear proper knee braces after doing an ACL and I also prefer goggles rather than sunnies and a screen. I wear a really well ventilated RST jacket that can keep me cool on the warmest of days and I layer up for cold rides preferring a wet over jacket to a wet internal liner. Its worth carrying some wet weather gear for when things turn wet as it could end up being a long cold ride home. Finally a 3 litre hydro pack on the back to keep me hydrated. Buy gear that works well rather than makes you look good.  |
The Ultimate Riders Guide To Accommodation in Tasmania.


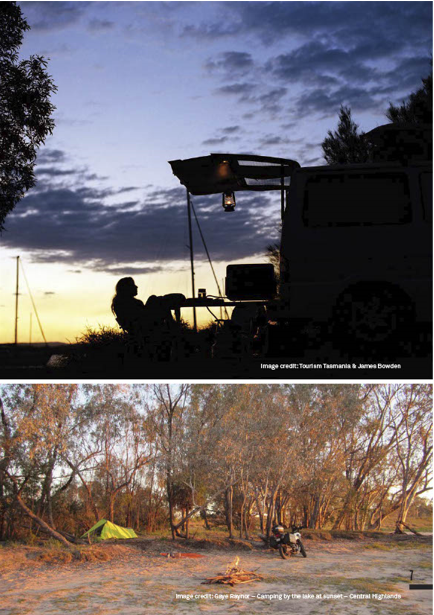


What navigation device should I choose.
Contributors name - Steve Fraser
I use a Garmin 595. Its good for longer trips but not that great for local off road trails. I tend to be pretty basic when it comes to navigation and will still take a paper map with me if I am in a country I haven’t ridden before. Technology can let you down but a map always works.
Contributors name – Damien Keygan
I use a Garmin GPS 64sx unit with full Oz Toppo mapping on a RAM mount. I also use Google Maps and GPX tracker app on an old IPhone 6 in a life-proof case also mounted on a RAM mount.
When I am on trips I take a small spiral bound HEMA “Road and 4WD tracks” book that lives in my tank bag. Technology is great but you just cant beat paper.
I have USB charging points for both units in my fairing and also carry a small battery bank for backup power. You never know when an electrical issue on your bike will occur and the power pack might just get you out of trouble.
Contributors name - Colin Bayman
Edit 1 - August 2021 - I have just bought a second hand Garmin Montana 780. Give me some time to work it out and get out and use it and I'll add some comments.
I use a Rugged Android phone called a Blackview BV5500 Pro and hang it off the bars with a spring loaded RAM mount. I use a couple of Apps downloaded from Google Play and choose which one I use based on the days riding. I use the free Here We Go App for point to point navigation (click on the right settings and you get a pretty good off-road experience) I also use Hema Explorer ($50.00) for exploring, saving and sharing the GPX files. There are lots of free off line Apps you can play with.
My advice is to download some offline Apps and practice using them before hitting the trails. Just like anything, you need to be competent in what you are doing.
Contributors name - Glen Baker
In Australia, I use a combination of paper maps (HEMA do great ones for almost all areas you'll be covering) and technology. I use an android phone loaded with OSMand app and All-trails apps. Both are very easy to use and are free. I did have the HEMA explorer app on my old iPhone but that died and the app went with it.
I have USB charging points on my handlebars and use a Quadlock mount to secure my phone. I prefer the Quadlock to the RAM X mount style. I still have the RAM and sometimes when overseas use it on a rental bike. I find the Quadlock easier to use and more secure than RAM.
Where can I get information on suspension.
A couple of the Perth Suspension Gurus that can be trusted -
North - Dynotime in Wangara - (08) 9409 5633
South - Endurowe Tech in Oakford - 0417 969 583
Contributors name – Damien Keygan
Getting your suspension sorted can be a game changer and most bikes will benefit from spending money here rather than on flashy bling you think your bike needs.
I’m probably typical of most blokes in that I’m not the 60-70 kg rider that the factory was thinking of when they launched their latest dirt weapon. I’m around 96kg’s if I’m being kind to myself, then with riding gear and whatever I strap to my bike I’m easily throwing over 130kg’s on my steed.
I find word of mouth from other riders, local clubs/forums and reputable bike dealers/mechanics can provide a wealth of knowledge. Get in touch with those who know what they are doing for the good oil on what will work as a setup for you and your style.
Whilst I’m running electronic suspension on the Super Tenere and it has a huge range of adjustability I don't really need to change it. If I was on manually adjustable gear I’d be heading to Endurowe tech in Oakford. I’ve heard nothing but good stuff from others/forums on the service and work there so that’d be my starting point.
Contributors name - Colin Bayman
I am sure all the contributors will say almost the same thing. Its the best money you can spend on a bike. It will keep power to the ground on the rear wheel and certainly keep the wheels on the ground for braking. There are a number of suspension Gurus in Perth who can all do a great job on any bike. Upgrading springs alone and new fork oil can be around the $900 mark and if you are really keen and want re-valving then you add a couple of hundred dollars more. Some bikes are really not that difficult to just swap out springs so consider having a crack yourself before parting with $1000.00.
I do have an affordable offer for DRZ's where I only change out the springs to the correct weight and drop in some 10 W fork oil. Of course getting the clickers just right for you as well as the sag is also important. Its a real game changer on a trail bike like this and many others.
Contributors name - Glen Baker
Suspension and braking are two things you should really consider when riding off-road. For all the electronic gadgetry and thousands of dollars shedding a few kilos of weight, none of it will give you better bang for your buck than throwing a few dollars into your suspension or brakes upgrades.
I am fortunate that I'm average height and weight and typically find bikes will be built to suit me. Although if you're above or below the average in these then I recommend having it adjusted for you and your load specifically. For any technical information regarding suspension I suggest talking with a specialist. There is a lot of information on this subject and I suggest reading into a little of the basics if you're investing into a big trip.
Contributors name - Steve Fraser
When you are chasing that little bit more out of your suspension and a spring and oil change isn’t cutting it then I use Endurowe Tech in Oakford. They are able to re-valve, set up and importantly put your forks and rear shock on the suspension dyno and work out what is and isn’t working.
Much like engine tuning, this is an art and years of experience go a long way. I have had bikes set up by them to travel around the world carrying 30-40kgs of gear and also had them tune the suspension on a enduro weapon meant for single track racing.
If you like to push hard or you are a part time racer then this is money really well spent. There is nothing like getting on a dirt bike that is perfectly set up for your weight and riding style.
Three points of contact - Adventure seat
Contributors name - Colin Bayman
DRZ400 - Seats Concept
You just cant sit on a standard DRZ seat for more than 30 minutes so unless you are only riding enduro trails you will need to upgrade.
Tenere T7 - Standard seat
I must say the standard seat is pretty good on these bikes and I have done some big days in the saddle. I am looking at the Seats Concept for this bike as well and will let you know if I swap over.
Contributors name-Glen Baker
I'm a masochist, I have stock seats on everything and average 50,000 kms a year on dirt and road. If you do have soft cheeks, I hear seat concepts are a great upgrade on the 690.
Contributors name – Steve Fraser
KTM 690 Enduro R – Seat Concepts
If you are doing any adventure riding on a KTM you will need a seat concepts seat. Seriously KTM do you make your seats out of timber.
KTM 500EXC six-days – Seat Concepts
Transforms the bike into something that is pleasant to ride all day on.
Kawasaki Z900rs
Standard seat with a retro leather seat cover – this is an amazingly comfortable standard seat well done Kawasaki.
Contributors name – Damien Keygan
Comfort is subjective and what works for you might not work for me. I’ve never really delved into aftermarket seating as I’ve always been a believer in a good sheepskin, and maybe a little eggshell foam under it for luxurious hours in the saddle.
On my old 800GSA I had the BMW comfort seat and it was good for around 300k’s before a stretch off the bike was needed. Was it better than the stock? I don’t know as it came with the bike.
My Tenere 1200 apparently has a seat that’s comfortable enough for crossing Europe if you believe the press, I still have a sheepskin and eggshell foam on it, subjective!
Many riders swear by brands such as Sergeant, Corbin, Seat Concepts etc. (especially DRZ, KTM owners I notice) but these are a lot of coin for fabric and foam, and to me its money that could be going into the tank, food bag, beverage fund for the adventure to come
Three points of contact - Foot pegs
Contributors name - Glen Baker
I have tried a few and can't noticeably tell the difference. Pivot Pegz are very unique and I hear some love them and others hate them.
Contributors name - Steve Fraser
I change all my adventure, enduro and off-road bikes to larger rally type pegs and the larger the platform the happier I am. I grew up riding long before Pivot Pegs were around, so call me old fashioned but I haven’t got used to Pivot Pegs and I still use a fixed peg on all my bikes.
My favourite combination is a large rally type peg and a set of Steg Pegs this makes me feel really connected to the bike and gives me the best control I can get off-road.
Contributors name – Damien Keygan
I’m quick to swap out factory pegs as most are to small and narrow making your feet ache and you could slip off the pegs. These issues can certainly make a ride less enjoyable.
Along with handlebars and seats, they make up the rider triangle, and play an important part in both comfort and performance giving you confidence when shifting weight around for control.
I prefer larger flat rally style pegs as they give good grip and support your foot when standing. They also tend to have better mud shedding properties and some even have screw in pins for the ultimate in customizing.
I’ve always liked SW MOTECH’s range of pegs. They are big without being obtrusive, have a good serration but don’t chew the bottom of your boot sole to bits and are pretty light for their build quality and strength. They also come with a rubber insert for road vibration reduction that’s removable for off-road use. IMS also make some excellent aftermarket pegs for a wide range of bikes.
I have tried Pivot Pegs but couldn’t seem to ever get a comfortable foot position on them. They are definitely a quality built peg and very popular but just not for me.
Contributors name - Colin Bayman
Standard pegs are just too narrow for standing on for long periods and I believe do cause fatigue from trying to balance on them. I have also experienced early wear on the middle of the soles of boots as the edge of the peg is in the middle of the boot.
My DRZ has Mck 3 Pivot pegs with the Lee Greer extension while the T7 has the standard pegs with Lee's extensions.
Beware of eBay specials !!! I have DRZ and T7 pegs already extended and ready to fit on an exchange only basis. Your old pegs must still be in good condition.
Three points of contact - Hand Grips
Contributors name – Colin Bayman
If motorcycles were invented today they would never be allowed on the road. Humans are not designed to bounce off anything at more than walking pace so the idea you can sit on a motor with two wheels and ride like crazy while only connected loosely by your arse, feet and hands is a pretty crazy idea.
We have covered of pegs and seats in other sections so I thought I would share some of what I like up in the cockpit.
Handle bars –
T7 - the standard bars are just right for my height and the bike feels good standing for long periods. Once they bend I will swap them out for something better but the same height.
DRZ – I like high controls so a set of bar risers and even high bend bars on this bike makes standing while adventure riding so mush more comfortable. Make sure your cables are not stretched with this set up and a good trick is to turn the throttle body upside down so the cables come out from underneath.
Grips –
T7 – I'm not completely happy with my grips as I have fitted a set of Yamaha heated grips. While the ability to keep your hands warm on a cold morning is outstanding I find the thin grips a little hard and not as comfortable as my normal choice of grip. The T7 has bar weights and doesn’t vibrate much so its not too bad.
DRZ – I have used soft foam grips of various brands for a long time. They are thick and soft to feel while taking out lots of vibration and certainly reduce blisters if hanging on tight!!!! I don’t recommend these for full on enduro work as you can never grip the bars as well as you can using thin grips. You want comfort on an adventure bike so I say go the 786 foam Rally Grip or similar. PS – I have tried Pussy Grips and found them useless.
Brake and clutch set up –
Something I notice on heaps of bikes that is not done well. Having your levers sitting horizontal with your bars is only for siting on your bum on the road and even then you can usually adjust them a bit better to get them more accessible. If your riding in the dirt and not standing at least some of the time you are not doing it right. Your levers should be very easy to access when you are standing, hitting tricky terrain and concentrating more about staying upright than trying to find your brake!!!
Bark busters are to protect your hands and not your levers so you don’t need to hide them behind those flash plastic things. I set up the height of my levers by simply leaning my bike up against a wall and climbing on In the standing position. I then try to stand in the “aggressive” stance I would if I was about to hit something nasty ahead. I always hold the bars using my pointer finger ( on both sides) and pulling in the levers with the other three. If you don’t have a complete handful of fingers do your best! I then reach out for the levers and make sure my fingers do not hit the levers in the natural reach. If they do, back off controls and push the levers closer to the ground until you can just reach out your fingers naturally, slide over the top of the levers and pull them in.
You can now continue to hold the bars without them being ripped out of your hands but at the same time access the controls with ease. Please note – Your clutch should be adjusted so that when you have your pointer finger wrapped around the bars, your clutch is adjusted to allow it to work properly pulling it in with the other fingers and not needing to squash your pointer finger. Clutch control is a wonderful thing.
Steering damper – I have a Rally Moto fitted to the DRZ and I would say it has saved my neck plenty of times. Like all good things they don’t come cheap but for around $650 I would say one nasty crash they would have paid for themselves. I don’t have one on the T7 and really don’t think I will fit one as I use the bike far more for the long haul stuff.
If you can stand comfortably on your wide adventure pegs, sit in an arm chair for the transport sections and hold onto the bars to properly access your controls you will have a much better experience and might live to see another day.
How often should I change the oil, oil filter and air cleaner?
Contributors name - Steve Fraser
KTM 500exc - I tend to change the oil and filter every ride if I have been riding hard and I always use fully synthetic oils. I used this bike for a ten day ride in the Victorian high country and changed the oil and filter every 500kms as it was more adventure riding than enduro.
Air filter is done after most rides. I do use filter socks on all my bikes which is great for multiday rides. I will carry a snap lock bag with 3-4 filter socks and change them every day or so depending on the conditions. A good tip is to carry a spare zip lock bag so you can put the dirty filter sock in and can be used to clean them in when you need to.
KTM 690 Enduro R - I change the oil and filter every 5,000kms again using fully synthetic oils. Filter socks work great on the 690 and allow for longer intervals between cleaning the filter.
I am old school and still use traditional filter cleaner and Motul filter oil which do a great job.
Contributors name – Damien Keygan
So many variables? Are you an enduro rider, weekend tourer, track day bandit? What’s the environment like that you ride in, dusty, hot and dry, colder than a get well card from your mother in law? Is your bike air/oil cooled or liquid cooled as well? Single, twin, triple etc.
My base line is definitely no greater time/distance than manufacturer’s specification. If it has a recommendation for hard use/adverse conditions then follow those instructions.
When I ran a KLR650 in Darwin the recommended change out was every 6000k’s but because it was stinking hot and a big thumper, I’d do oils/filters every 3000k’s. It never let me down.
My 800GSA was every 10’000k’s, but it was a liquid cooled twin, and under warranty so even though it too got a flogging, it only got changed via the BMW requirements. That bike did 35’000k’s in the NT on some seriously remote terrain and never skipped a beat in 3 ½ years.
I believe that the vast majority of bikes available these days are robust durable bits of kit and they’ll get by on factory recommendations but you’re never going to do your ride a disservice by showing it a little extra love. I also recommend you fit an external fuel filter that you can inspect and change out if necessary when needed. It's no point having the best oils if your fuel system is dirty.
Contributors name - Colin Bayman
I know oil is cheaper than engine repairs so probably do it a little more often than necessary.
DRZ400 - For hard enduro work with lots of high revs I change the oil and oil filter every 500 kms. If there is any dust around the air cleaner gets looked after every ride. For much easier adventure riding I change oil and filter every 2000 kms.
Tenere T7 - I changed the oil and filter at 1000 kms and then at 5000 kms and will do it again shortly at 10 000 kms. I use a pre filter on this bike and clean it most dirt rides.
I use NoToil on my filters which is a biodegradable system. Its very clean to use and doesn't leave a residue in the sink ( all cleaned with warm water in the laundry trough) Its also doesn't smell and can be done much easier on multi day rides. Also consider using air filter socks so they can be removed after a hard days riding leaving a nice clean filter ready to ride the next day.
Contributors Name - Glen Baker
Engine maintenance is something which is very easy and a huge investment for your machine. Do it as often as you can and use the best quality products which you can reasonably afford. Very few people complain about spending a few bucks extra on keeping their bikes running great.
KTM 690 enduro - I change my oil every 5,000kms. While I'm dropping the oil I change both oil filters on the motor. You can pick up the dual filter kits online or at your KTM shop. I use the manufacturer spec oils and filters (Motorex unless unavailable in the bush somewhere on a big ride). So far this has given my engine great life and reliability.
Triumph speed triple - Every 5,000kms approximately. It's easy and quick to change the oil so I do it myself as frequently as I can using fully synthetic oil. The filter is a reusable K&N which you clean, then re-oil and insert again. It has never given me any troubles.
BMW K1200S - I change the oil every 10,000kms as its a daily commuter doing high mileage but not ridden hard. Just up and down the highways and around town. I use fully synthetic oils.
Slip on mufflers
Contributors name - Colin Bayman
I am not a big fan of spending $1000 to save a couple of kilos and to make a lot of noise. If its about performance, my two current bikes have ample HP to do the job for me. I like to hear the engine so I prefer a small tail pipe mod if its available and to spend the money on other stuff.
The DRZ is easy to give it a bark. Just remover the tail pipe and unbolt the extra baffle covering the spark arrestor. It is a bit noisy but I find great on the dirt. I have muffler mods made for the mighty T7. It doesn't make it any lighter nor does it give it more HP but it does make it sound very nice. Check them out in the sales section. The feed back has been great with this little inexpensive mod.
Contributors name - Glen Baker
All my bikes exhausts have been modified with the weight and sound of the exhaust as the two primary reasons. I think some exhausts are naturally very heavy and when off-road it is a simple way to remove some weight. I also love hearing the bike purr along on the trails. It helps other bikes with a little more power which they can do with.
KTM 690 Enduro - Akroprovic exhaust is much lighter and much cooler!!!! It doesn't melt anything like your bags or yourself and sounds a load better. I do love this Akro exhaust.
Triumph speed triple - Arrow Low Boy 3 into 1 system. This is a beast of an exhaust its a massive weight reduction but also the 3-1 sounds fantastic and looks much smarter with its minimalist design.
BMW K1200S - Akroprovic exhaust as again it is much lighter and cooler and sounds so much better. I found it also noticeably affected the lower end pick up in the first couple of gears as well over stock exhausts.
Contributors name - Steve Fraser -
I tend to change the mufflers on all my bikes as manufacturers are trying to fit into the ever tightening euro emission’s and mufflers and the bikes are the victims.
KTM 500exc - I have an Akrapovic muffler on the 500 it is great quality super light and sounds amazing. More importantly it allows the motor to breath the way it was designed to.
If anyone has ever ridden a KTM two stroke that was built in the last two years with the factory muffler they would know it is an underpowered slug. Change it to an Akra and it becomes a rocket ship and it is probably the best example you will come across about a manufacturer complying with the emission’s laws and killing the bike. The manufacturers make aftermarket ‘race only’ exhausts for a reason.
KTM 690 Enduro R
The 690 has a low mount exhaust to allow the fitment of the 450 rally kit. The system on the bike is a Thor full system.
How to wire up your spot lights
Contributors name - Colin Bayman
Before you go fitting spot lights have a good think whether you really want to ride at night anyway. I never plan to ride at night and if I needed to because of circumstances I doubt whether I would ride any faster with spot lights fitted. Spot lights don't stop you from hitting wild life but not riding at night does. Good luck with what ever you choose and I hope this simple diagram will assist you to fit some.

Before you go fitting spot lights have a good think whether you really want to ride at night anyway. I never plan to ride at night and if I needed to because of circumstances I doubt whether I would ride any faster with spot lights fitted. Spot lights don't stop you from hitting wild life but not riding at night does. Good luck with what ever you choose and I hope this simple diagram will assist you to fit some.
Adventure bike luggage
Contributors name - Steve Fraser
I run two totally different set ups depending on what type of travel I am doing.
Multi-day rides up to about two weeks -
My preference is for soft bags as they are much kinder on the body if you come off. I use Mosko Moto 40l reckless loop bag. I really love the light weight approach and versatility of this set up. Basically they have three separate bags, you can add additional bags to this to increase your overall capacity to around 60l. This gives me plenty of storage space for my camp gear, clothes, food and other basic essentials. It is a light approach which I like to try and keep the bike as light as possible. This set up encourages me to tackle some of the more technical stuff that I otherwise might avoid with a bigger set up. I used this for a ten day ride through the Victorian high country and rode some of the nastiest tracks and climbs Australia has to offer and it worked a treat.
Round the world – set up
This requires a different approach and for me that means hard panniers with security as one of the main reasons. As a professional photographer I carry some very expensive camera gear and it is not always possible to keep the bike in your view when you park up to get some food or go to the toilet. The other issue is that if you come off hard (and I did) then the panniers take most of the impact and the camera gear survives.
I used the Touratech hard panniers on my around the world trip on the KTM 690 with three external soft bags. One on the rear of the bike and the other two on the lid of the panniers. The soft bags would hold clothes, food, wet weather gear – stuff that if it was stolen it was easy and cheap to replace. Inside the panniers on one side was all camera gear and the other pannier had my tent sleeping gear, spare parts etc.
No matter if you are using panniers or soft luggage, one of the best tips I can give you is have everything in smaller bags and label them. Compression bags are awesome for clothes, sleeping bags etc. This reduces the space your gear takes up and having them labelled is super helpful at the end of a really big day, the last thing you want to do is pull out all your packed gear to find that one item. I use lots of the sea to summit bags of various sizes they are affordable and last for years.
Contributors name – Colin Bayman
I like the traditional approach to carry my camping gear. Both my bikes have a similar set up –
Top and side racks using quality Andy Strapz soft panniers and a Wolfman top bag. I suggest using smaller dry bags to separate your gear and make it easier to locate. I keep the cooking gear and food on one side and clothes, toiletries etc on the other. The top bag carries the tent, sleeping bag, self inflating mattress. pillow etc.
I also use a Giant Loop tank bag to carry the phone, wallet, tyre gauge, sunnies and all the stuff that wont fit anywhere else. My tools are carried on the rear rack on front of the top bag in an Andy Strapz Trunkz bag. It fits heaps of tools, tubes, compressor and spares as well as being very robust and water proof. I don’t suggest the tool tubes as I have seen those fail far to many times.
I also use Rotopax containers to carry extra fuel and water if the trip requires it. I do not recommend hard panniers for off road use as they can cause injury in an off but will protect your gear much more. I also don’t like the raised bar work on top racks that bags attach to as they can also cause injury.
I think if you are carrying anything more than this you are probably taking too much. Spend the money and buy quality as it will either gives years of service or you will be able to move it on and get a decent price for it. After you have loaded your bike you should check to see if your suspension is up for the job. Check the sag and upgrade to heavier springs which are generally required.
Most of this gear is quite expensive to buy if you are doing a one off ride so I have started to build up a range of basic gear that I can hire out.
Contributors name – Damien Keygan
I only run soft luggage. A GIVI tank bag, and a set of Andy Strapz AVDURO 2 panniers with an appropriately sized top bag depending on the ride I'm on. My current set up is either a 40ltr or 80ltr dry bag.
These panniers fit any rack I’ve used, weigh bugger all, and are kinder to me in the event that we should ever meet unexpectedly. Drawbacks; Security, if somebody wants your stuff they’ll get it easily; if they’re not strapped securely over rough terrain they tend to tear themselves apart,(never experienced this myself, but have seen it on others), and depending on the material of manufacture they may not be waterproof, (dry bags inside will remedy this). Damaged soft luggage can be easily patched, stitched if needed, either by a local or yourself.
Hard panniers have advantages for those who need security for expensive items, and are probably better suited to “World travellers”, i.e. in and out of towns/cities as you travel, a mix of tar and dirt roads. Laptops, cameras, personal medications and documents are far more secure from people and the elements; most panniers have lashing loops so you can strap a bag on top, and of course, what’s a pannier if it’s not covered in stickers from you travels.
The down side to hard bags; They weigh a fair bit, some have complex locking or hinging systems and are prone to filling and seizing from dust/mud etc. Drop your bike and you may not be able to reshape/reseal your metal box, and Ali fab/welders can be hard to come by in remote places. Plastic panniers are even worse.
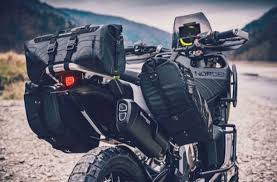
What tools should I carry on my dirt bike
Contributors name - Steve Fraser
My first answer is lots. Nothing worse than being stuck in the bush and not having that tool you need with you. I carry two tool rolls. One of them is generic tools and the second tool roll has specific tools for the bike I am riding.
I always carry a spare brake and clutch lever for whatever bike I am on. I came off hard a few years ago in the heart of the Victorian high country and even with bark busters I managed to snap the front brake lever. Try riding down some of those insane tracks without a front brake will help build your character.
All the usual things like spanners, small socket set, Allen keys, Torx keys, tyre levers are a great starting point. There are some really great options out there and really it’s what works for you. I will carry spare nuts and bolts, lots of cable ties, race tape, metal glue.
I also carry a small compressor and a very small push bike size hand pump (just in case) and a couple of tubes. For longer trips I carry a spare set of brake pads, spark plugs, and fuel injector, plus a few of the inline fuel filter specific to the bike I am on. I also carry a couple of chain master links and a small section of chain. A fork seal tool like seal mate is cheap and takes up no space and might save you one day, it happened to a friend I was with and stopped the front fork from spewing out oil, we finished a six week ride with no issue.
Remember to use the tools you carry on the bike occasionally to work on the bike at home. This way if you are missing something you will find out at home and add it to your kit.
The reality is you won’t use very much of this if you look after your bike and prep it well for a trip. Make sure the oil has been changed, the chain and sprockets are in good condition and new tyres are a no brainer .Starting a long trip on half stuffed tyres makes no sense, I meet a guy in Africa who was starting a 10,000km ride on worn out tyres. Good luck getting a tyre in the back of Tanzania.
Contributors name – Damien Keygan
I can’t speak for the dirt bike/enduro scene but as a large ADV bike rider I carry the following -
Tool roll containing - regular, Allen and hex sockets and ratchets, socket breaker bar, Allen and hex keys. Various flat and Phillips screwdrivers, a million cable ties in numerous sizes, electrical and 100mph tape, and some vice grips. Metal putty, 2 tyre levers, gold marker pen for marking bolts to see if they’ve come loose over time or remark when refitted and a small manual bike pump as back up for small electric pump with a tyre plug kit with spare valve cores and stems, tyre pressure gauges. Small adjustable spanner, selection of fuses, and occasionally some extra engine oil in case I bust an engine case or sump. I try to avoid doubling up on things where I can, i.e. if a hex socket and a hex key will both fit a particular bolt or fastener then I’ll drop one of them from the roll.
I don’t carry extra brake/clutch levers as I have shorty levers and they seem well protected from falls (jinxed it now), I don’t usually carry spare wheel bearings as I normally check them before a trip, although “Murphy” can strike at any time so I’ll probably grab a fresh set soon. Chain stuff is no issue as I have a shaft drive. I used to carry fork seal stuff but since fitting neoprene sleeve savers I’ve never had an issue with weeping seals.
I’m pretty meticulous with my maintenance, inspect the bike before and after any good ride and so far this has kept me upright and gotten me home.
Contributors name – Colin Bayman
I carry pretty much the same on a day ride as I do on a multi day ride. On longer trips I just take a few extra spares like wheel bearings, brake pads, clutch, brake and gear levers and an extra air filters and oil and cleaners.
Small metric socket set, small set of Allen key sockets, a couple of screw drivers, a small selection of metric spanners, the correct wheel removal tools for that bike, tyre levers, ( valve snake and bead helper for changing flats) 12 volt compressor (Tom Cat) trail stand (for holding the wheels off the ground to fix flats), jump lead kit fitted to access power easily when needed, A large adjustable spanner, a brass drift, a couple pin punches, a spoke spanner, electrical tape, spare chain links, tube of metal fix, spare plug, plug spanner, a few fuses, electrical joiners,
I suggest you work on your bike at home using this kit and if you need anything more to undertake standard maintenance or remove wheels then you add those bits to your kit. Crack your wheel nuts undone at home and do them up using your bike tool kit to ensure you will be able to undo them on the trail. The bike shop might have done them up with a rattle gun and you will struggle to undo them with a small spanner.
I don’t suggest carrying tools to do jobs for parts you are not carrying, You don’t need a ring compressor for a top end rebuild!!! Maintain you bike well and have less problems on the trail. Do periodical maintenance like replacing wheel bearings, chains and sprockets so there is less likelihood of failure on the trail. For big multi day PAR rides I also insist on brand new tyres with heavy duty tubes fitted.
Bike protection - What do we use!
Contributors name - Steve Fraser
My starting point for every bike is bark busters. To be more precise, highway dirt bike hand guards. I love these because they have built in mirrors that fold into the bark buster when you are off-road and they are built like a tank.
The next essential is a great quality sump guard. Again it depends on your budget and what you like, there are a number of quality brands but just don buy crap don’t buy crap. Radiator guards are a good idea the factory plastic guards won’t stop much at all, it’s easy for a decent stick or rock to hole the radiator. Also if you are not running a large fuel tank the radiator guard will help the tank so it’s not crushed if you come off.
I swap out the factory indicators on my bikes to much smaller LED units that don’t stick out and won’t get damaged when I drop it.
Depending on your bike case saver can be an essential I have them on my KTM 500 as this is the widest part of the bike and most likely to take a serious impact. Some of the bigger adventure bikes I have had I have added crash bars, these have come in handy and save a lot of money in the event of an off.
Contributors name – Damien Keygan
Bike – 2016 Super Tenere 1200 ES - It’s a behemoth, and it needs good strong gear to support it.
Altrider crash bars - protects the bodywork, fuel tank, and side mounted radiator. They work well - example: Say you’re drinking beer one day in your garage, and decide to move your bike off its centre stand so you can walk around and admire it. Bugger of a chip in the concrete, and certainly gets the wife’s attention…
Bash plate – I’m running the factory alloy plate. It’s got sufficient coverage to protect all the soft bits, but isn’t over the top huge.
It can certainly support the full weight of the bike off road in a hit, but I don’t go out aiming to pierce it like the Titanic either.
Pannier racks – Not necessarily dedicated protection but I’ve got a set of Aussie made Barrett racks and they do a great job out the rear.
Bark Busters – I generally consider these a must on any bike however having said that I’m still yet to fit them to the Tenere. I think given the shorty levers fitted, and the fact that I’m not whipping through the single track and brushing past the trees, the stock hand shrouds have given good service. They appear to be quite thick and robust thus far, but I will get around to replacing them soon.
Contributors name – Colin Bayman
DRZ400 – Its a bit of a tank and due to its design and build it really is a tough little bike –
Bark busters, B & B bash plate, radiator guards, engine side cover protection and you are almost done. Side racks help protect the bike and a Safari tank helps prevent side radiator impact damage. A couple more little tips is to disconnect your side stand switch ( bike can turn on and off on rough trails when connected) Re-route the engine breathers into the air box so small water crossings don’t kill the bike. ( There is another Q & A on this one)
T7 – Start with the list for the DRZ and then add some bar work. I have gone for top half of the Yamaha crash bars with R & G engine protectors. I also added a head light protector because that head light assembly is really expensive. The R & G tail tidy keeps the bike looking good and will have far less chance of damage in an off. I really like the B & B bash plate on the T7 as it not only looks good but protects really well including the suspension linkages. Probably nothing to do with protection but a nice pair of bar grip heaters sure makes it cosy on a cold day.
How to re-route the carby breathers on a DRZ
Contributors name - Colin Bayman
Check out https://youtu.be/vsHBdBGGDSs. A couple of good mates of mine - Jason and Attilio playing in the shed. Jason covers this off in an easy to understand format with a few other tricks up his sleeve. You may need to copy and paste this link into your web browser.
I have done mine and plenty of others now and after a few deep water crossings can testify that the bike kept going and didn't suck water up into the carby.
Where are the best places to ride off road near Perth.
Contributors name - Colin Bayman
Jump on the RTRA website for the best explanation of where you can ride legally and why -
Home - Recreational Trailbike Riders' Association (rtra.asn.au)
Unfortunately you will need a licensed bike and a motorcycle license to ride almost everywhere except private property and a few off road ride areas. Perth is surrounded by bush with great spots to get out into but make sure you have a rego plate hanging off the back. Just a short list of my favorite spots that you can access easily-
Banksia Grove to GinGin on hard packed trails. Head out past the raceway and make your way over to Aqua Road and head north. Yep there are some horrible deep sand trails but if you stick to the limestone hard packed trails you will be fine. At some point head east until you hit the main North/South power line and follow that towards GinGin. With a GPS or off line map running you wont have any trouble finding GinGIn for a drink and burger. Certainly big bike friendly
Sawyers Valley - Head up Green Mount into Sawyers Valley and turn right into Tanks Road. Head up the gravel road a km or so and you will hit the start of the power lines. Turn right at the lines and head East for plenty of trails and tracks. The power lines is not for the newbies but there are plenty of surrounding trails for everyone's ability. If you are on a big bike head to the start of Firewood Road and head East.
Julimar National Park - Its a mix of easy and harder trails but there is something there for everyone. If its been wet there is a lot of mud and slippery hill climbs. Its not a huge area but worth an explore. Stick to the outside fence lines for the easiest rides.
If you like a bit of sand and most do on bigger bikes head to Lancelin. Grab a pie at the bakery before heading to the off road ride area. Skim around the western side of the ride area and head north on the trails. At some point you will hit the Army Fence line and can either turn back or ride it East down to the main highway. Turn north again on the highway and follow the bitumen up to the Wedge Island turnoff. Turn in for a look or a great beach ride on a hard packed surface for around 15 kms by memory. Keep the speed and noise down in Wedge as well when you pass fisherman and swimmers on the beach.
Jarrahdale to Dwellingup - A great laid back ride starting with a coffee and breakie and ending with a cold one and a steak sanger. Start at the Jarrahdale General store (fill up before you get to Jarrahdale as there is not fuel there) Flick your GPS on and search for Dwellingup. Put your device on bicycle mode and avoid the main roads and you will be on dirt most of the way. There are plenty of little trails to explore on the way and when you see the pine plantations go for a ride around the outside trails for a look. Once at Dwellingup you can head down into Nanga Brook reserve where there are a huge amount of camp sites and put your tent up and light a fire and enjoy a camp out.
Another area worth looking around is Metro Road off Brookton Highway. Just turn south and start exploring. Once you are properly lost, turn on your GPS and look for Jarrahdale and head in that direction.
Try to always ride with others. Even if you carry an EPIRB or similar it doesn't mean you are in a position to set it off on your own. Did someone say motorcycles are dangerous!! They are.
Do you wear prescription glasses to ride?
Contributors name - Colin Bayman
10 % discount just for mentioning RIDE WITH ME when you place an order.
Dealing with prescription glasses with dirt, dust and goggles is difficult and I have heard riders say they were about to give up off road riding until they found Goggleman. These guys make a set of lenses using your spectacle prescription and this fits inside your goggles nicely. The goggles seal on your face so your lenses do not get dirty and you only need to swipe your goggles to be able to see again.
www.goggleman.com.au
I have used these myself and can recommend them personally. Heaps of riders use them. I am not affiliated with these guys in anyway and I am just endorsing a good product. Dave from Goggleman is offering anyone who mentions this site 10 % discount off their purchase.
10 % discount just for mentioning RIDE WITH ME when you place an order.
Dealing with prescription glasses with dirt, dust and goggles is difficult and I have heard riders say they were about to give up off road riding until they found Goggleman. These guys make a set of lenses using your spectacle prescription and this fits inside your goggles nicely. The goggles seal on your face so your lenses do not get dirty and you only need to swipe your goggles to be able to see again.
www.goggleman.com.au
I have used these myself and can recommend them personally. Heaps of riders use them.
I am not affiliated with these guys in anyway and I am just endorsing a good product. Dave from Goggleman is offering anyone who mentions this site 10 % discount off their purchase. Sun glasses, goggles or just the helmet visor.
 Contributors name – Damien Keygan
All three have a time and place. On road I’ll often use sunglasses or the drop down tinted visor inside my helmet. I generally only use the outer visor in poor weather conditions as I like a good airflow through my lid. When I’m in the dirt, out bush or with other riders I usually turn to goggles.
Dust, insects, branches, rocks thrown up from lead riders, sunglasses are little protection in these cases, drop down shade lenses even less so. Outer helmet visors will protect you from flying object impacts but won’t keep out the dust.
I keep my goggles in a soft bag inside my tank bag as I find I tend to go through a few pairs if I leave them on my helmet. Falls, scrapes and bumps when I precariously rest my helmet on my bike only to hear it fall as soon as I turn my back have taught me this lesson, life may be kinder to you haha.
Contributors Name - Colin Bayman
I like all three choices. I often ride with just some sunnies and pull the screen down on the dirt but as soon as I get behind a rider in the dust I pull over and swap to goggles.
I use the quick strap setup on my goggles and they "live" on the back of my helmet ready to swap them out and drop my sunnies in the tank bag.
The two reasons are -
Goggles keep the dirt out and stop grit from getting in my eyes.
Also because when I need to clear the lens on the goggles I only have one surface to clean instead of 4 surfaces with the first approach.
Just make sure your helmet will fit the googles into the opening properly and be able to seal on your face properly. I currently use a Bell MX9 helmet and I have used Oakley O goggles for years.
Which device should you carry to save your life.
This section is yet to be completed.

Recreational Trail Bike Riders Association
Contributors name - Colin Bayman

Recreational Trailbike Riders' Association (rtra.asn.au)
These guys are working for you to keep trails open and to provide a voice for all West Australians to ensure our Children and our Grandchildren have a safe place to ride in the future.
You can support them by joining for a small annual fee and you can also have a say and help improve trails for us all. Go and check out their website and spend some time reading about their achievements.
There is also a full list of where you can ride and where you cant.
Trail and Enduro club of WA.
Contributors name - Colin Bayman 
This club runs a great round of off road enduro style racing over the winter months. You will need a well prepared enduro bike and need to know how to ride off road. They also run an awesome rally in May every year called the Adventure Rally, it's non - competitive enduro style ride without the stop watch but a whole lot of fun. A dirty old DRZ will do the job and some guys do it on a DR but you wouldn't want anything bigger.
I have personally ridden in around 10 Adventure Rally's and had a ball. I have also ridden in many competitive enduros not trying to race but simply to have a fantastic ride in well organised events with signed trails and support all the way.
If you are not sure if this is for you then jump on their website and make some contact with one of their crew.
Why do you need a bike jumper lead kit?
Contributors name - Colin Bayman
There are lots of alternatives to using these kits however the main advantages are -
You can access power ( almost 60 amps) without removing your seat, side covers or gear on your racks,
You can start another bike or your own in just moments using the 1 metre long extension cable.
Add the alligator clips (another 10 seconds) and you can get help or be helped from any other vehicle regardless of whether they have the kit fitted.
Add a flush mount kit and the connection becomes seamless.
You can change the connections over to Anderson plugs on other devices such as trickle charges and air compressors which means you do not need a handful of wires connected to your battery.
The kits are well made and can be customized easily to meet your needs.
If you ride with a group of mates you do not all need to purchase the complete kits. Part 1 of the kit is available separately so all bikes can be fitted out for quick access while only some bikes carry the extra gear. ( The extra gear is very light and small)
I recently fitted out 8 bikes on a desert run where part 1 was fitted to all bikes while only two full kits will be carried in case of emergency. Total cost $220.00.
Check out the For Sale section on the site.
Should I disconnect my bikes side stand kill switch.
Contributors name – Damien Keygan
I’ve personally never done it as I’ve not had the need to. There are some bikes that do benefit from the mod DRZ’s, KLR’s, and the new Honda CRF300 Rally do seem to have weaker springs which can lead to intermittent cut out when riding rougher terrain, seen it on a review by MAD, but very obvious in the riding footage. Some are horribly exposed and benefit from this to reduce trail damage. This mod does increase the risk of accidental starting in gear whilst on the side stand, potentially causing unwanted fall damage to the bike, and I’d be interested to see how an insurance claim would go should you apply, if you couldn’t reverse the mod.
Contributors name - Colin Bayman
I suppose it comes down to which bike you ride. A heavy side stand with a weak spring can jump around on the trail and make the bike engine cut in and out. I disconnect on DRZ's and DR's as they are renowned for it. You do need to remember the bike will then start in gear while sitting on the side stand so it could be dangerous. I believe there is far more danger with an engine cutting in and out and happy to take the risk. Please weigh it up yourself and make a good decision before making the mod.
T7 exhaust mod
Contributors name - Colin Bayman
 Riders change pipes for a lot of reasons but usually say it is to give the bike better performance and also to save weight. While I agree I also think it is to give their bike that lovely note which most love to hear.
A decent system cost hundreds of dollars while you can buy a cheaper Flea Bay special over the net. I developed an easy to install mod that is very inexpensive and gives your bike a great note while opening up the tail enough where you can feel the difference. It doesn't make the bike too loud but does have a great note once you get moving.
If you are Perth based I have a spare standard muffler with a mod fitted so you can drop it on for the weekend and see if this is what you want, I can also fit it for you for just a couple of extra dollars.
More details in the Sales section on the site
Riders change pipes for a lot of reasons but usually say it is to give the bike better performance and also to save weight. While I agree I also think it is to give their bike that lovely note which most love to hear.A decent system cost hundreds of dollars while you can buy a cheaper Flea Bay special over the net. I developed an easy to install mod that is very inexpensive and gives your bike a great note while opening up the tail enough where you can feel the difference. It doesn't make the bike too loud but does have a great note once you get moving.
If you are Perth based I have a spare standard muffler with a mod fitted so you can drop it on for the weekend and see if this is what you want, I can also fit it for you for just a couple of extra dollars.
More details in the Sales section on the site
Mini air compressor
Contributors name – Damien Keygan
I carry a Rocky Creek Moto pressor and to me an air compressor is a no brainer and not just for flats. Compressors are a great bit of kit for playing around with tyre pressures. The ability to drop pressures to get a bigger footprint on the ground, soften a ride on corrugations and float over sand are all great reasons to carry one. I use mine accordingly to adjust the tubeless tyres on the Big Tenere.
In the last couple of years I’ve also found alternate uses for my mini compressor. Dust all over your goggles? Don’t wipe them down and scratch your lenses, blow them clean. Is your helmet full of dust? Compressed air will get that out.
Need to get that campfire cranking, don’t bend over into the smoke and blow or fan it, just give it a little compressed air.
It’s also a great tool for your post ride bike clean. Sand, red dust around you battery or delicate electrics, don’t smash it with the hose, blow it clean with the compressed air and same with your air filters, handle bar switch gear etc. Need to inflate a sleeping mat ?
Go out and play with your pressures to find what suits you, your bike, and your riding terrain. A few PSI can make a big difference.
Contributors name - Colin Bayman
At some time you will probably need to deal with a flat on the trail. At the very least you should be airing the tyres up and down depending on where you are riding. I use one of these small compressors which you can find for less than $40.00 on Flea Bay. I also remove the standard power connection and fit an Anderson plug so I can access power quickly through the bikes jump start kit.

What tyres pressures do I use? If you use heavy duty or Ultra heavy duty tubes you can ride lower pressures off road. I use HD tubes in both of my bikes.
DRZ400 off road 18 psi back and front.
DRZ400 on road 30 psi back and front.
Tenere 700 off road 22 up front and 18 rear.
Tenere 700 on road 35 psi back and front.
If I am having a lazy day on the Tenere and there is a good combination of on and off road I often just set them to 25 back and front and leave them that way.
I have a mate who rides a DRZ400 and says he lets his down to less than 10 psi back and front on sand and never had a puncture!!!
I carry a Rocky Creek Moto pressor and to me an air compressor is a no brainer and not just for flats. Compressors are a great bit of kit for playing around with tyre pressures. The ability to drop pressures to get a bigger footprint on the ground, soften a ride on corrugations and float over sand are all great reasons to carry one. I use mine accordingly to adjust the tubeless tyres on the Big Tenere.
In the last couple of years I’ve also found alternate uses for my mini compressor. Dust all over your goggles? Don’t wipe them down and scratch your lenses, blow them clean. Is your helmet full of dust? Compressed air will get that out.
Need to get that campfire cranking, don’t bend over into the smoke and blow or fan it, just give it a little compressed air.
It’s also a great tool for your post ride bike clean. Sand, red dust around you battery or delicate electrics, don’t smash it with the hose, blow it clean with the compressed air and same with your air filters, handle bar switch gear etc. Need to inflate a sleeping mat ?
Go out and play with your pressures to find what suits you, your bike, and your riding terrain. A few PSI can make a big difference.
Contributors name - Colin Bayman
At some time you will probably need to deal with a flat on the trail. At the very least you should be airing the tyres up and down depending on where you are riding. I use one of these small compressors which you can find for less than $40.00 on Flea Bay. I also remove the standard power connection and fit an Anderson plug so I can access power quickly through the bikes jump start kit.
What tyres pressures do I use? If you use heavy duty or Ultra heavy duty tubes you can ride lower pressures off road. I use HD tubes in both of my bikes.
DRZ400 off road 18 psi back and front.
DRZ400 on road 30 psi back and front.
Tenere 700 off road 22 up front and 18 rear.
Tenere 700 on road 35 psi back and front.
If I am having a lazy day on the Tenere and there is a good combination of on and off road I often just set them to 25 back and front and leave them that way.
I have a mate who rides a DRZ400 and says he lets his down to less than 10 psi back and front on sand and never had a puncture!!!
Over size brake disks and braided brake lines
Contributors name - Colin Bayman
Dirt bikes are not built to pull up on a dime on the road cause if they did they would lock up off road every time you applied them. The brakes are generally fine for trail work when not carrying big loads and a Safari tank full of fuel.
So now you have loaded your DR650 with 30 kgs of gear, filled the 30 litre Safari tank to the top, strapped on your 3 Litre hydro pack and over Christmas you put on a few extra kgs and now weigh 100 kgs. You are heading down the highway at 120 kph on some scuffed out off road tyres and a kangaroo jumps out at you. Are your brakes sufficient? because my advice is that they are not. You are kicking down the gears and hard on both brakes but still not slowing down quick enough.
I fitted an oversize front disk kit with a front braided brake line on mine and it made a world of difference. Its worth looking at all of your options but one thing for sure - upgrade your brakes if you load up your older style bike.
How to stay warm in a tent during the winter months.
Contributors name – Damien Keygan
There’s a reason man went into the caves it's because fur and leaves don’t protect much in adverse weather. Let’s talk getting cosy.
Tents can provide hours of debate on weight, pack size, price etc, but in the end you generally get what you pay for. I’m not advocating a $400, 10 gram hiking tent, but you can bet I’m not in a $ 20 6kg Aldi one either.
I have 2 different 2 man tents ( I also winter hammock and swag camp). One is a free standing dome for hard ground where pegs are useless, and the other is a wedge shaped number, good for deflecting strong winds etc but requires pegging down. Both weight around 1.5kg’s, are worth about $130 each give or take and both have seen some horrific weather without any failures or leaks.
2 man tents let you store your gear out of the elements as well. Some have a ground sheet (footprint) but I don’t bother with them. I have a sea to summit self-inflating, insulated sleeping mat. It is absolutely the best mat I’ve ever used but it wasn’t cheap. Its insulation rating is for above the snowline and it’s thick enough that I don’t touch the ground when I’m on my side (I’m around 96kg). It also rolls down small for packing.
Sleeping bags are a real case of getting what you pay for. Big W isn’t your friend here but you don’t need a $600 virgin goose down either. Look at the ratings, what are the rating levels, the comfort level, and the extreme level. Do you sleep hot, or cold?
I run 2 bags; my winter bag is a -12’ Denali Altitude from Anaconda. Its mummy shaped, ie it tapers towards the feet to allow for a snug fit so my body isn’t trying to warm empty space. I got it on sale at 50% off so I saved myself $150 by getting it in a summer clearance. It’s warm enough that I can sleep in my birthday suit with no dramas.
My summer bag is an Oztrail, rated to 0’, and inside I have a comfort liner that can give more heat or act as a standalone thinner bag for warm nights. The bag is rectangle shaped for freedom of movement and the liner is mummy shaped but not constrictive. Combined, these are sufficient for all but the coldest of nights.
Layering is a personal choice. Some people love thermals and a beanie and some jocks and t-shirt, and some butt nekkid. I’m the last kind, beanies make my head itch, and I’ve never been able to sleep in clothing comfortably. I just snuggle down and cover my head in my bag hood.
Ya can’t have a good sleep without a comfy pillow and I’ve tried most options. Inflatable, foam, stuff t-shirts into a sack etc.
I bring my pillow from home because I’m soft and I love it.
I’ll always take a pee before I kip out, because I hate getting up to do it later. Some use a bottle in the tent, but my aim is shaky at 3 am so I’ll brave the cold if it’s the last resort.
Contributors name - Colin Bayman
First you will need to buy a decent tent of course. I don't spend a fortune, as long as it doesn't leak. I have used a couple $150 tents from Anaconda that have done the job. I suggest a 2 man tent so you can sleep down one side and use the other to keep your riding gear etc out of the weather. I also like side entry tents as they are easier to get in and out of.
I see some guys placing a tarp under their tent in wet conditions. I find the water pools on the tarp and you can end up sleeping in a puddle. The little 2 man tents are designed to allow the water to flow under them.
So get the tent put up and remember if its going to be a wild night you are best in the open rather than trying to get protection from a tree that might drop a limb on you and injure or kill you. Also look to see where the natural water course will be and don't camp at the bottom of a hill in something that will end up looking like a swimming pool. Go the high ground.
So the tent is now up and you are ready to set up the sleeping area. First thing I lay down is a windscreen heat reflector that I purchased from Super Cheap for $10. It folds up to nothing and provides really good insulation from the cold coming from the ground. Then I put down my mattress ( I use a self inflating mattress) and my sleeping bag which is correctly rated for the conditions. A $29.00 Kmart bag is bulky and will keep you awake all night, this is where you cant be tight with your money. I feel the cold and would prefer to be a little warmer than needed so I also use a flannelette sleeping bag liner. They are absolutely awesome and give your bag an extra - 10 degrees rating easily. A comfy pillow is also a must and I use the quality memory foam pillows that pack reasonably small and expand when unpacked to give you a decent sleep.
Did I say I feel the cold!!! I then pull on my thermals. Its not a fashion statement and with my larger frame and fat gut I must look a sight but who cares. Lastly a beanie goes on the head to keep my ears warm and knowing that plenty of heat can be lost through the top of the head.
I haven't gone to this much effort just to freeze my butt of when I need a wee. I take a large plastic ice coffee bottle with a big opening ( I m a big boy) to bed. When I need a wee it goes in the bottle and I stay warm.
Cast rims VS spoked rims - What's best for off road.
Contributors name – Damien Keygan
This topic pops its head up pretty often, and there’s plenty of opinions in each camp, as most manufacturers have cast and spoked rims in there line up.
Without doubt, both options are capable of getting off the beaten track. Look at all the BMW’s that regularly partake in the GS Safari/Enduro rides each year. Those organised rides take in plenty of remote country, some of it quite challenging, and the cast rimmed bikes are regular finishers and always well represented in numbers.
Suzuki’s venerable V-Strom series of bikes, Honda’s Varadero, and multiple others have travelled some of the most far flung corners on earth on cast wheels.
They have the benefits of being easy to clean, you don’t need to “true” them, no spokes to tighten and they’re tubeless for easy puncture repair (although you can fit a tube if needed). Down sides seem few but there are a couple; If you bend the outer rim they can be difficult to reshape to retain air/tyre bead and if you crack the rim or break one of the alloy “spokes” they can be unrepairable requiring total replacement.
Durability appears to be predominately rider based to me. If you love your air time, rock gardens, gnarly tree rooted bush tracks at any sort of speed then cast rims are probably not going to serve you well for very long although most of the bikes that come with these wheels are not the desired tools for this style of riding anyway. If you like to see the sights, approach obstacles with a measured sense of caution and accept the limitations of cast alloy then these should serve you for the life of your bike.
Spoked rims are considered the more durable choice for any serious off road foray, you don’t see KTM 690R’s with cast alloys. These rims come in a large variety of sizes, front and rear, allow for tubed or tubeless options and are considered more robust for the rough stuff. They are less prone to breakage( but not unbreakable) are easier to bash back into shape on the side of the track with a hammer/rock etc., and usually wont self-destruct if you lose a couple of spokes. Down sides are; they can be difficult to balance, require truing and if you lose/break spokes the replacements can be difficult or expensive to come by.
I personally have always run spoked rims on my off-road bikes, not because I’m giving my wheels a hard time, actually the opposite, I think they’re more forgiving of my clumsy line choice, that square edged rock I didn’t see on the track in the bulldust etc. They are a compensatory measure for my foibles but I also just happen to prefer the look of spoked rims to alloys anyway.
Each has its pro’s and con’s, choose the tool that’s right for the job and you will enjoy the benefits.
Cant see what you are looking for?
Simply send me an email and let me know. I will do my best to find you an answer and if I think it will be valuable to others I will add it to the list. Go and click on "Contact" in the banner at the top of the Home page.
Contributors
Read a little about the people who provided responses to "Interesting Topics"
Services of others
Email me Here
- Hillarys WA, Australia
I wont always answer your enquires straight away as like you I love to go riding. Sometimes I'm away camping and out of range or maybe even on holidays but at some point I will respond. (ABN 30116154181 )